Showing posts with label Airbrushing. Show all posts

Tuesday, April 15, 2014

Adepticon 2014 Recap - Part II

Saturday

Saturday at Adepticon turned out to be mostly a social day - we spent most of the day wandering around, meeting people, reconnecting with friends, and generally hanging out.  One of the first things we checked out was the Warhammer Fantasy hall, which had some amazing display boards:


Out in the hallway, we met James Wappel and his amazing Imperial Guard display:


Next, we went to the display cases to check out some of the awesome Crystal Brush entries:


Next, I made another run at the vendor hall.  One of the things I was thrilled to find were these paint & brush racks from Ironheart Artisans:


I've been looking for something similar to these for a while, ever since I saw the very cool ones made by CNC Workshop, but the problem is that they're in Australia - which means the cost of shipping the items is actually more than the cost of the items themselves.  These paint racks are very similar, for a fraction of the cost.  I wanted a paintbrush rack ever since I saw the ones from Games & Gears, but those are hardwood, very expensive, and (again) ship from overseas - this is a very similar item for a much lower price!

Another cool thing that Ironheart Artisans was doing was to sell commonly needed items for a lot of the classes at Adepticon - Raphael brushes, hobby supplies, etc.  (I've needed to buy a brush at Adepticon before, and it's INCREDIBLY frustrating to be AT A MINIATURE GAMING CONVENTION and nobody is selling brushes.  One of the items they had that I've meaning to pick up forever (but always manage to forget while I'm at the art supply store) was a small color wheel:


Next, I stopped by the Cool Mini or Not booth and picked up some of the Instant Mold that I've been meaning to try:


I also swung by the merch booth and picked up the requisite t-shirt:


When I met back up with my friends, they presented me with a gift (Saturday was actually my birthday) - a Kossite Woodsman unit!


Next we went foraging for food - we happened upon a burger joint called Tom & Eddies, and it was fantastic.  After dinner we headed back to the hotel to unload our purch
ases and unwind.

Sunday


Sunday I woke up early and headed over to my last class, Airbrushing Miniatures with misterjustin from Secret Weapon Miniatures:


Although it makes for a lousy pic, this was actually a pretty good seat to have for the class - I was able to see over Justin's shoulder for a great view while he was working!

I have to say, when I first decided to try airbrushing, I think I took three different classes at conventions about the subject, and to be blunt, they all sucked to varying degrees.  In the long run I wound up puzzling through it by myself, making a lot of mistakes, and wasting a lot of money - I really wish I had taken Justin's class first, because it was excellent.  He presented pretty much everything you would want to know about airbrushes, paints, additives, safety, and some basic techniques.  (It was also more than little validating that a lot of what he taught in the class lined up really closely with the airbrushing guide I wrote a few years ago).

After the class, I went back to the hotel to eat breakfast and start packing up.  After lars4life and I loaded up the car (which was substantially more full than when we left) we made one last run through the vendor hall, but I couldn't find anything that I couldn't live without (even though the guys at the Black Library booth tried their best to relieve me of my last few dollars).  We headed home, another Adepticon in the bag!

Tuesday, October 11, 2011

Airbrush Parts Tip

A couple of posts ago I mentioned that I got a Badger SOTAR 20/20 airbrush, and that I was going to try to buy the parts to convert it from a "fine" setup to a "medium" - the problem is, SOTAR parts are really expensive!  And while I've never had anything but excellent service and super fast shipping from Badger's own supplier, I'm happy that I discovered you can get a lot of Badger airbrush parts WAY cheaper on Amazon - I paid less than half of what Wyn-Wyn wanted for the same parts:


Now I have everything I need to convert my SOTAR - check it out if you need parts on the cheap!

Tuesday, October 4, 2011

New Airbrush

...you might recall that in my Aibrushing Guide I gave recommendations for ten or so airbrushes that are commonly used in the "hobby" community - one of the most highly regarded airbrushes is the Badger SOTAR 20/20.  Unfortunately, it's also very expensive, so I figured I'd never get a chance to try one unless I stumbled upon one secondhand - then I got an email from Badger that they were closing out a small number of the SOTAR airbrushes for 75% off.  I decided I couldn't pass up such an opportunity, and after waiting a couple of weeks (apparently some parts were backordered) the postman dropped one off at my door:


I haven't even had a reason to try it out yet - the model they were closing out had the "fine" needle & tip, which is crazy small - I'll probably try to source some "medium" parts to make it less finicky with hobby acrylics.  With this acquisition I'll probably be listing some airbrushes on eBay, too, as I have too many to use at this point...

Monday, August 15, 2011

New Airbrush Compressor

I was browsing Craigslist the other day and came across an ad for some airbrush stuff - I went and checked it out and wound up getting this compressor for a song:


It's a Testor's compressor that has a much stronger motor than the Harbor Freight compressor I've been using - it's also got a built-in cooling fan & runs a bit quieter than my current one, which is nice.  Sitting behind it in the pic is a Paasche single-action airbrush that the guy threw in - this will be handy when I want to spray varnish or Future acrylic wax, but don't want to risk gumming up one of my good airbrushes...

Monday, August 1, 2011

Airbrush Parts

Yay, I got some parts for one of my airbrushes in today!


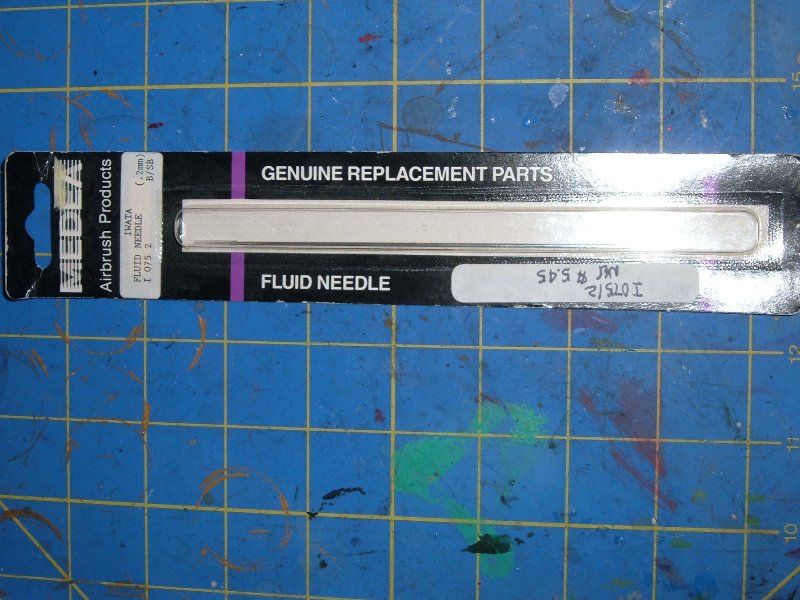
These parts are for my Badger 360 - I found out that I can swap out the needle, nozzle & tip from "medium" to "fine":

 new nozzle & spray regulator

 new needle

This allows me to achieve much finer lines:


I also got in a new regulator:


I ordered one of these previously, and it was a leaky piece of junk.  This one seems to be working properly...

Wednesday, July 27, 2011

Today's Find: Iwata Eclipse

I found a pretty good deal on Craigslist the other day - an Iwata Eclipse airbrush & a bagful of spare parts for $25:


As I mentioned in my article on airbrushing, the Eclipse is a good choice for airbrushing models - this particular one is a side-feed brush, so it wouldn't seem to be ideal, but the Eclipse line is specifically designed to shoot thicker paints, so it's not a problem.  The seller told me that his father was a graphic designer and had recently passed away - he was cleaning out the house, and put these on Craigslist.


The nice thing is that the airbrush came with spare 0.2mm needles & nozzles:


...the current Eclipse isn't available in 0.2mm, and can't be converted to my knowledge - you have to spend another hundred bucks on the Iwata High Performance Plus model to get 0.2mm.  At some point the Eclipse series was redesigned (the new models have a cutaway handle) and Iwata must have changed this.  If you look at the parts list for the High Performance Plus models, at the bottom there is a listing for the needle & nozzle for the "Original HP-B" - that's what this is.  Pretty nice to get a 0.2mm Iwata airbrush for twenty-five bucks.  The brush was pretty gummed up - I got the feeling it had been sitting for at least a decade, and I had to resort to pliers to get the old needle out.  I gave the airbrush a thorough cleaning & put in one of the sets of still-in-the-package needle & nozzle, and it works great!

I also decided to greatly simplify my airbrush setup - previously I was running a manifold with a separate hose for each of my airbrushes, which required a ton of adapters & fittings, and was causing me to lose pressure.  I went to a single-hose setup and added quick disconnects to all my airbrushes - here is a pic of everything that was removed from my setup:


...yeah, that's probably gonna make a difference...

Monday, July 11, 2011

Karchev the Terrible & More Cinematic Effects

...as I mentioned in my previous post, I tried to buy some cinematic effects from Armorcast while I was at Adepticon, but they were sold out of the ones I wanted for my Freebootas.  However, at the time my gaming group was really starting to dive in to Warmachine, and I remembered seeing this pic while looking through the cinematic effects on the Armorcast website:


picture from Armorcast

...needless to say, I thought that was pretty cool.  Around this time I had also picked up the Karchev the Terrible warcaster model from Privateer Press, and was excited about painting it - I decided that I'd pick up some of the cinematic effects and give them a try with the Karchev model.  Before leaving Adepticon I stopped by the Armorcast booth and picked up a couple of the Large Smoke Plumes.

Here's the smoke plumes right out of the package:


...and here's the built Karchev model:


Hmmm.  Most of the warjacks have a single exhaust stack at the top, but Karchev has six, three on each side- the smoke plumes aren't going to work as-is.  To solve this, I took my hobby saw and cut the smoke plumes down to the approximate width of the row of smokestacks:


Then I sunk some pins into the smokestacks, and drilled out the smoke plumes:


I mixed up some Green Stuff and sculpted the area where the plumes joined the smokestacks:


After the model was primed, I painted the reds with my airbrush, as seen in my zenital airbrushing tutorial:


I used the airbrush with some oranges & yellows to fade the appropriate colors into the recesses of the smoke plumes:


To do the "outermost" part of the smoke plumes, where they would be the darkest, I turned to Forge World's "Black Soot" weathering powder:


I mixed it with some water and applied it to the spots where I didn't want any color to show through at all:


Then, I applied the dry powder with a brush where I wanted it to be somewhat transparent:


I had had problems before with the weathering powders getting where I didn't want them, so I decided to fix them before moving on to the rest of the model.  I masked the rest of the model off with an old shopping bag and applied some Krylon matte varnish:


Oh no, what's this?!?!


I had the dreaded "white fuzz" appear on the smoke plumes immediately.  It actually happened right before my eyes - I think the weathering powder was absorbing all the propellant/medium in the varnish almost instantly, making the varnish dry too fast.  (I was spraying indoors, and I've never had a problem with this matte varnish before).  I tried re-coating it, with similar results - after looking around online and talking to some people via Twitter, I used a paintbrush dipped in mineral spirits to remove the fuzz:


Then I gave the smoke plumes a coat of Testor's Dull Kote, which I usually abhor:


Okay, crisis averted.  Unfortunately I lost some of the color on the smoke plumes during that little fiasco, and I had to spend some time touching them up with some more orange & some yellow ink.  Now at least I could move on to painting the rest of the model.

I started by giving the whole model a wash of 50/50 Baal Red/Devlan Mud:


Then I started adding the colors, mostly the black & metallics:


...about this time the freakin' model broke on me AGAIN, in a spot that had already been pinned AND epoxied (those annoying fringe "skirts" around the back).  This time I resorted to JB Weld and a clamp to repair it:


...the pictures of the painting process get kinda sparse around here, since the clearcoat fiasco & the breakage cost me a couple of days, and I was rushing to get done.  Mostly it consisted of finishing the weapons, face, and painting a billion brass rivets.

Since I'm doing a winter theme for the bases on my Khador models, I bought these cool little icicles from Dragon Forge Designs:


I cut a small section and glued them to the side of the base:


(I realized later that I actually glued these on backwards, since there was a big nasty vent mark on the section I chose - oh well).  I wasn't concerned about cleaning up the top edge of the icicles, since I was planning on covering it with snow effects from Secret Weapon Miniatures:


...another cool item I picked up from Dragon Forge with this model in mind was this cool large resin display plinth:


After giving it a scrub, I gave it a couple coats of GW Chaos Black Spray:


Then a quick spray with some Dull Kote:


After everything was done, I pulled out the light box & good camera for a photo shoot:


Finished pics:


Overall I'm fairly pleased with how he came out, although I didn't get to do everything I wanted - my original plan was to do his weapons with non-metallic metals, and I would have liked to have tried some OSL effects from the fire like in the Armorcast product photo, but I just ran out of time.  Building the model was an exercise in frustration (there are more pins in that model than in Evel Kinevel's spine) and it broke on me multiple times when I was handling it during painting.  That, plus the complications with the varnish, plus the fact that it's become pretty obvious that Karchev is not going to be my warcaster of choice for my Khador force (The Butcher & Sorscha are both too good) meant that I was ready to be done with this model...