
Wednesday, September 22, 2010
Brush Sale!
Following up on my post on brushes from the other day, Art Supply Warehouse is having a brush sale for the next two days - you can get Winsor & Newton Series 7 brushes for 64% off. If it's time for some new brushes, get over there and pick some up!

Tuesday, September 21, 2010
Talbot The Cleric
I've been playing in a sporadic D&D campaign with some friends for years - after several years our DM recently finished his Ph.D. (congrats Jer!) and our game got upgraded from "sporadic" to "semi-regular". Shortly after 4th Edition debuted, we all decided to make the switch, and I went with one of the new races and a class I had never played before - a Longtooth Shifter Cleric. Up until now I had actually never painted my a model to represent my character in a RPG - I just used one of the pre-painted figures from the D&D Minis line, or borrowed a mini from our DM. I decided it was time to remedy that and went looking for a model that fit the bill. I found this model over at Reaper:
I liked the look, and since I was ordering more parts for my Freebootas anyway, I added him to my order. A few days later, he showed up:

...he was gonna need a bit of work, so I got started - first of all, I knew I was going to use a custom base, so I needed to remove his current base. I clipped most of it away with my flat clippers, then shaped the feet with my jeweler's files:


I noticed that his mace lost a bit of detail on the segment that was up against his leg - I used my pin vice to drill the "cutout" shape:


Next I decided he needed to look more "longtooth-y", so I went with the obvious choice: Mutton chops! I pretty much slapped some Green Stuff to his face and started shaping it:


They actually came out pretty well. My next step was to pin his feet:


And I mounted him to an old soda cap for painting:

...I pretty much painted him in one go on my day off, and didn't really take any "in-progress" pics - here he is finished:

Overall I was pretty pleased with how he came out. I wasn't aiming for competition-quality - I have a game this weekend, and he's going to be thrown in my backpack every few weeks with my books & dice and hauled across town, so a bit above tabletop-standard was the goal. Here's the paint schematic for those who are interested:
- Armor (gauntlets/shield): Based w/ GW Boltgun Metal, washed with Badab Black, highlighted w/ Mithril Silver. Insignia on shield: GW Tin Bitz
-Armor (chest plate): GW Shining Gold, washed w/ Gryphonne Sepia
-Robes (blue): 50/50 mix of GW Ice Blue & Vallejo Imperial Blue, with just a bit of GW Space Wolves Gray; washed with GW Asurmen Blue
-Robes (red): GW Mechrite Red, washed w/ GW Baal Red
-Robe (border): 50/50 mix of Vallejo Bald Moon Yellow & P3 Brown ink; washed w/ GW Devlan Mud
-Leather (bags, belts, etc): P3 Brown Ink
-Leather (boots): GW Snakebite Leather; washed w/ GW Devlan Mud
-Hair: Vallejo Black, drybrushed w/ GW Adeptus Battlegray
-Flesh: 70/30 mix of GW Dark Flesh & Elf Flesh; washed w/ GW Baal Red
-Vial on belt: GW Warlock purple, (cork) GW Bestial Brown


(picture from Reapermini.com)
I liked the look, and since I was ordering more parts for my Freebootas anyway, I added him to my order. A few days later, he showed up:

...he was gonna need a bit of work, so I got started - first of all, I knew I was going to use a custom base, so I needed to remove his current base. I clipped most of it away with my flat clippers, then shaped the feet with my jeweler's files:


I noticed that his mace lost a bit of detail on the segment that was up against his leg - I used my pin vice to drill the "cutout" shape:


Next I decided he needed to look more "longtooth-y", so I went with the obvious choice: Mutton chops! I pretty much slapped some Green Stuff to his face and started shaping it:


They actually came out pretty well. My next step was to pin his feet:


And I mounted him to an old soda cap for painting:

...I pretty much painted him in one go on my day off, and didn't really take any "in-progress" pics - here he is finished:

(I will be posting a tutorial about the scenic base soon).
Overall I was pretty pleased with how he came out. I wasn't aiming for competition-quality - I have a game this weekend, and he's going to be thrown in my backpack every few weeks with my books & dice and hauled across town, so a bit above tabletop-standard was the goal. Here's the paint schematic for those who are interested:
- Armor (gauntlets/shield): Based w/ GW Boltgun Metal, washed with Badab Black, highlighted w/ Mithril Silver. Insignia on shield: GW Tin Bitz
-Armor (chest plate): GW Shining Gold, washed w/ Gryphonne Sepia
-Robes (blue): 50/50 mix of GW Ice Blue & Vallejo Imperial Blue, with just a bit of GW Space Wolves Gray; washed with GW Asurmen Blue
-Robes (red): GW Mechrite Red, washed w/ GW Baal Red
-Robe (border): 50/50 mix of Vallejo Bald Moon Yellow & P3 Brown ink; washed w/ GW Devlan Mud
-Leather (bags, belts, etc): P3 Brown Ink
-Leather (boots): GW Snakebite Leather; washed w/ GW Devlan Mud
-Hair: Vallejo Black, drybrushed w/ GW Adeptus Battlegray
-Flesh: 70/30 mix of GW Dark Flesh & Elf Flesh; washed w/ GW Baal Red
-Vial on belt: GW Warlock purple, (cork) GW Bestial Brown
Friday, September 17, 2010
Brief Updates
Work on Space Hulk continues:

...the Tyranids just need some small details & highlighting done, and then they'll be ready for clearcoat. I don't know why, but I didn't take hardly any work-in-progress pics of them - it didn't even occur to me, for some reason. Originally I had wanted to try a different paint scheme for these, but I'm pretty much following the GW Stage-by-Stage Painting Guide for Space Hulk on their website to the letter, except for some other manufacturer's equivalent colors & a homemade wash - I'll post a paint list when I'm done.
In other news, my new brushes arrived:

I missed the brush sale at Art Supply Warehouse, so I decided to try the Dick Blick studio brushes - Les Bursley seems to like them, so they're probably good enough for me. I report back when iget a chance to try them out.
I've got a few tutorials 90% written up, but I've been waiting on one order from Europe to arrive to finish - i suspect nefarious activity at my local post office (it's a looong story). I'm gonna go hassle them about it tomorrow...

...the Tyranids just need some small details & highlighting done, and then they'll be ready for clearcoat. I don't know why, but I didn't take hardly any work-in-progress pics of them - it didn't even occur to me, for some reason. Originally I had wanted to try a different paint scheme for these, but I'm pretty much following the GW Stage-by-Stage Painting Guide for Space Hulk on their website to the letter, except for some other manufacturer's equivalent colors & a homemade wash - I'll post a paint list when I'm done.
In other news, my new brushes arrived:

I missed the brush sale at Art Supply Warehouse, so I decided to try the Dick Blick studio brushes - Les Bursley seems to like them, so they're probably good enough for me. I report back when iget a chance to try them out.
I've got a few tutorials 90% written up, but I've been waiting on one order from Europe to arrive to finish - i suspect nefarious activity at my local post office (it's a looong story). I'm gonna go hassle them about it tomorrow...
Monday, September 13, 2010
A Word On Brushes
...so after about a year of heavy use, my workhorse paintbrushes, a Winsor & Newton Series 7 Miniature #1 & #2, need replaced - I trimmed a few stray hairs from the #2 the other day, and a few more popped up in my next painting session. The #1 started showing some strays today.
If you read through any miniature painting tutorial on the Internet, you'll see that watercolor brushes made from Kolinsky sable are the "gold standard" for mini painters - The Winsor & Newton brushes mentioned above are tremendously popular, but lately I hear many people raving about the Raphael 8404's. (Some other possibilities are the Blick Studio Sable brushes and the Escoda Series 1210). The thing I don't understand is that many people act like they are priced as if they were made from spun gold. To make it simple:
- There is no point in buying a Kolinsky sable brush larger than #2. Anything bigger than that, and you're likely just putting down large areas of basecoat. Use one of the brushes from your local hobby shop for that. (I prefer the Army Painter hobby series brushes, but the new line of Citadel brushes are actually pretty decent).
- Go to these websites and create accounts:
Art Supply Warehouse
Blick Art Materials
Art Supplies Online
(Note: I am not affiliated with any of the above stores, I just shop there frequently).
Once you start getting email coupons from these stores, you should be able to regularly get 15% - 20% off, and/or free shipping, on any order you place. This means you should never have to pay more than eight dollars for a Kolinsky sable brush - that's only a couple of dollars more than the synthetic brushes they sell in the hobby shop. (The Winsor & Newton and the Raphael brushes are harder to find at this price, but Art Supply Warehouse does a "70% off brushes" sale several times a year).
Take proper care of your sable brushes - wash them out with a good brush cleaner and cool water EVERY TIME you finish using them, and occasionally give them a wash with conditioner (yes, the same kind you use in the shower - just steal a bit from your wife's bottle, she'll never know). They should last you quite some time. As I mentioned, I got about a year of heavy use out of mine - I would regularly ruin hobby store brushes in a month under the same conditions...
If you read through any miniature painting tutorial on the Internet, you'll see that watercolor brushes made from Kolinsky sable are the "gold standard" for mini painters - The Winsor & Newton brushes mentioned above are tremendously popular, but lately I hear many people raving about the Raphael 8404's. (Some other possibilities are the Blick Studio Sable brushes and the Escoda Series 1210). The thing I don't understand is that many people act like they are priced as if they were made from spun gold. To make it simple:
- There is no point in buying a Kolinsky sable brush larger than #2. Anything bigger than that, and you're likely just putting down large areas of basecoat. Use one of the brushes from your local hobby shop for that. (I prefer the Army Painter hobby series brushes, but the new line of Citadel brushes are actually pretty decent).
- Go to these websites and create accounts:
Art Supply Warehouse
Blick Art Materials
Art Supplies Online
(Note: I am not affiliated with any of the above stores, I just shop there frequently).
Once you start getting email coupons from these stores, you should be able to regularly get 15% - 20% off, and/or free shipping, on any order you place. This means you should never have to pay more than eight dollars for a Kolinsky sable brush - that's only a couple of dollars more than the synthetic brushes they sell in the hobby shop. (The Winsor & Newton and the Raphael brushes are harder to find at this price, but Art Supply Warehouse does a "70% off brushes" sale several times a year).
Take proper care of your sable brushes - wash them out with a good brush cleaner and cool water EVERY TIME you finish using them, and occasionally give them a wash with conditioner (yes, the same kind you use in the shower - just steal a bit from your wife's bottle, she'll never know). They should last you quite some time. As I mentioned, I got about a year of heavy use out of mine - I would regularly ruin hobby store brushes in a month under the same conditions...
Friday, September 10, 2010
Space Hulk, Odds 'n Ends
 OH NOES TYRANIDS!!!
 ...just about every spare minute I've had this week has gone towards working on painting the models from my copy of Space Hulk. This was also the first time I worked with black-primed minis - thankfully, it worked fantastic for the 'nids. The black undercoat provides a perfect effect when used with thin coats of Game Color Imperial Blue and the purple mix, which is 50/50 GW Levithan Purple & Hormagaunt Purple. The 'nids served as a nice warm-up, since I haven't painted in quite a while - once the base coat is down, it's mostly just a few washes & some drybrushing until I can call these done.
In other news, I had to make some room on my painting table:

Yep, I finally got an airbrush booth. I've been wanting one of these forever, and when I first started looking at them, pretty much your only option was to drop $500+ on a stamped-steel booth with an industrial fan that took pricey filters. A little while ago I saw that Paasche came out with a compact plastic airbrush booth that was much, much cheaper - I came close to pulling the trigger on one of those, then I found that TCP Global came out with a spray booth that was billed as "the least expensive hobby spray booth on the market". The main differences I saw where that it didn't look quite as sturdy as the Paasche booth, and it didn't have the rotating turntable. I wasn't terribly concerned about the first problem, since it was destined to live a gentle life in my studio, and I solved the second problem by buying a $5 "lazy susan" tray. I've already used it a bit for priming:
 Needless to say, I'm really pleased with the results - I am tremendously picky about having perfect conditions to use spray primer, so I usually wind up having a whole box of models waiting to be primed, and I have to spend an entire afternoon playing catch-up when the conditions are right. Now I can just grab a particular model or two that I want to paint next, spray it in the booth, and get to work. The only problem I've had so far is that I bought a few bottles of Vallejo Model Air primer, which is gray - kind of hard to see on gray plastic, so I got a few runs on my first attempts. I've got some of Reaper's white primer on the way, and will give that a try next...
(NOTE: neither the Paasche or the TCP Global airbrush booths should EVER be used with anything flammable. They both use standard fans, as opposed to fans with brushless induction motors, which are specifically designed to not generate sparks (that's why the industrial-grade booths are much more expensive). This isn't an issue for me, since I only use water-based acrylics & water-based airbrush cleaner).
Thursday, September 9, 2010
Ork Biker Freebootas, Pt. 2
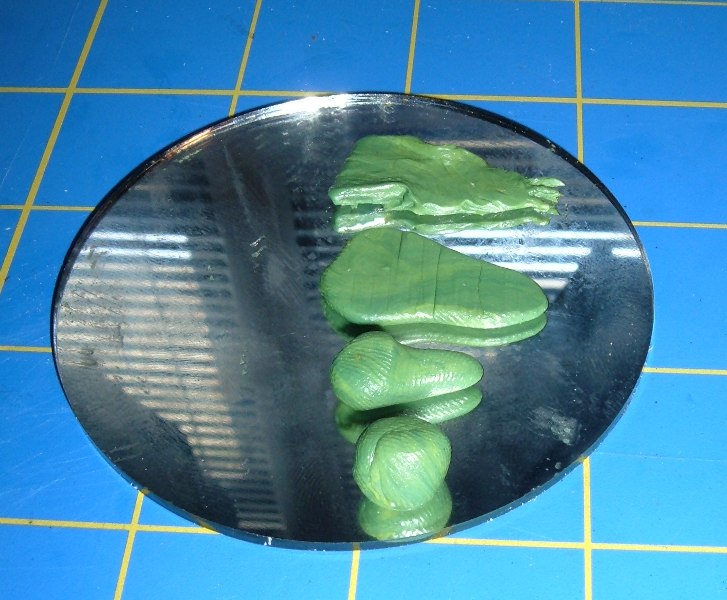
...I decided the next step in converting my Ork Warbikers to Freebootas would be to give them a flag, so each of them could fly an Ork version of the Jolly Roger. (Orky Roger? Jolly Orker? I need to come up with a name for that...) I've seen a lot of people create banners & flags out of paper or cardstock, but I didn't think that would hold up very well, so I decided to make them entirely out of Green Stuff. I mixed some up and started working it - the pic below shows the progression of the shape (from bottom to top):

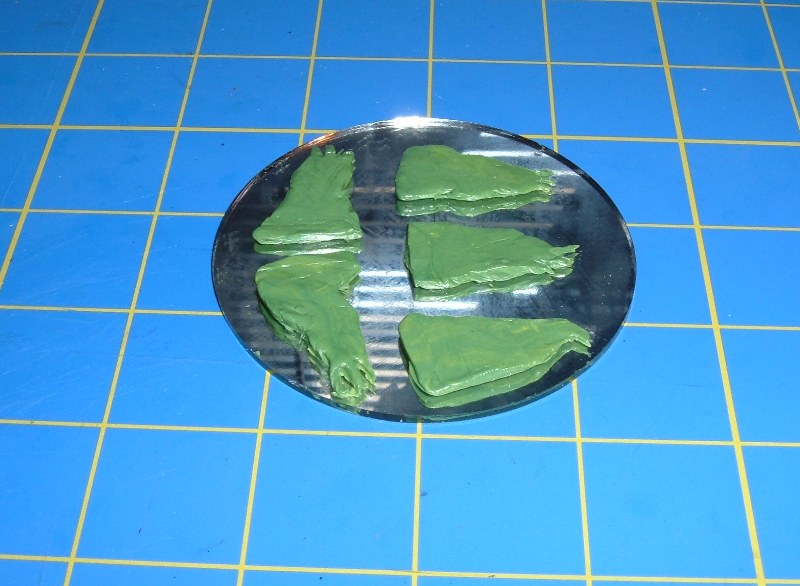
After I had five of them, I left them to dry:

After they were mostly dry (but before I pried them off the mirror) I filed a "notch" along the long edge of each banner - this is mostly to give me a guide for where the mast will go:


After they had completely cured, I popped them off the glass and cleaned them up in a few spots with my files:


The next step was to find a way to make them look like they were actually fastened to the bike's antennas, rather than just glued on. I decided to make "ties" for the flags. I started by mixing some Green Stuff and flattening it out with my sculpting tool:


Then I cut a thin "ribbon" with my hobby knife:

...next I cut the "ribbon" into equal segments. I laid a toothpick on my mirror and laid the segments across it - this will simulate the curve of the bike's antenna, and allow the ribbons to hold their shape while they cure:

To give them a bit more detail, I pressed one end of them slightly flat. For the other end, I made a small horizontal cut and spread then end a bit, then rolled a tiny ball of Green Stuff and placed it in the crook of the notch - a few presses with my knife and it looks like a knot:

 After everything was dry, I attached the banners to the bike's antennas:


...then I attached the ribbons and trimmed off the excess:

 At this point I decided they needed something else more "orky", so I drilled a small hole in the top of the finials, clipped off the end of a toothpick, and glued it in there to make a spike:

...and here's one after primer:

I'm working on making an airbrush stencil so I can put the skull-and-crossbones motif on each banner, but I might also use it as an opportunity to test my freehand lettering skills to see if I can get some orky sayings/slogans on them as well...
After I had five of them, I left them to dry:
After they were mostly dry (but before I pried them off the mirror) I filed a "notch" along the long edge of each banner - this is mostly to give me a guide for where the mast will go:


After they had completely cured, I popped them off the glass and cleaned them up in a few spots with my files:


The next step was to find a way to make them look like they were actually fastened to the bike's antennas, rather than just glued on. I decided to make "ties" for the flags. I started by mixing some Green Stuff and flattening it out with my sculpting tool:

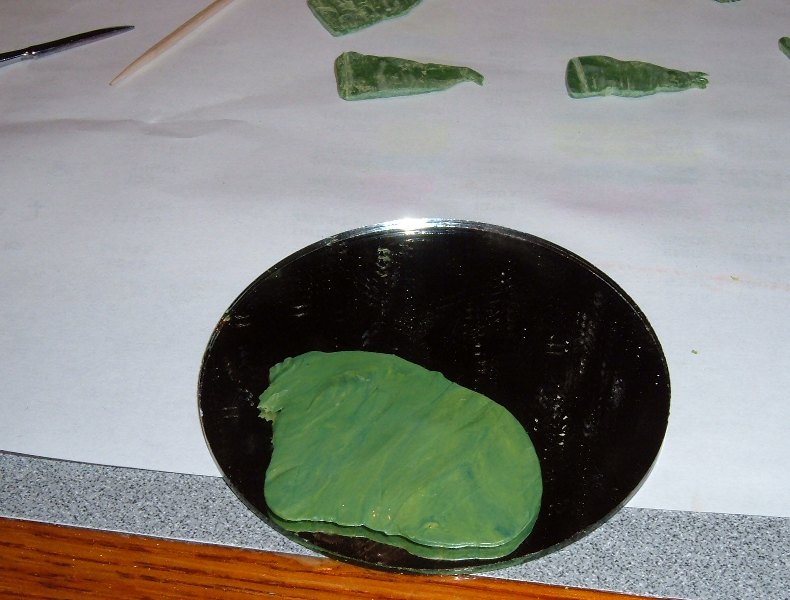
Then I cut a thin "ribbon" with my hobby knife:

...next I cut the "ribbon" into equal segments. I laid a toothpick on my mirror and laid the segments across it - this will simulate the curve of the bike's antenna, and allow the ribbons to hold their shape while they cure:

To give them a bit more detail, I pressed one end of them slightly flat. For the other end, I made a small horizontal cut and spread then end a bit, then rolled a tiny ball of Green Stuff and placed it in the crook of the notch - a few presses with my knife and it looks like a knot:

 After everything was dry, I attached the banners to the bike's antennas:

...then I attached the ribbons and trimmed off the excess:

 At this point I decided they needed something else more "orky", so I drilled a small hole in the top of the finials, clipped off the end of a toothpick, and glued it in there to make a spike:
...and here's one after primer:

I'm working on making an airbrush stencil so I can put the skull-and-crossbones motif on each banner, but I might also use it as an opportunity to test my freehand lettering skills to see if I can get some orky sayings/slogans on them as well...
Sunday, September 5, 2010
Ork Biker Freebootas, Pt. 1
The first step in "pirate-ifying" my Ork Warbikers is to change the emblems - the bikers were already built when I got them, and the previous owner built them with Evil Suns icons on the front & at the top of the antennas:
 The first thing I did was to clip off the emblems from the antennas:

...then I took some balls of Green Stuff I had made a few days previously (I stuck them down to a piece of tape while they were drying, so they wouldn't roll away):

I took my pin vise and drilled halfway through the balls - I realized after the first couple that there was a small "flat spot" on each one where they had sat while drying, and it was easier to keep the hole centered if I drilled there:

...then I topped the antennas with them:
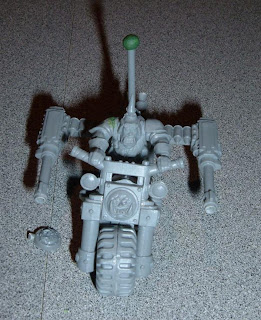
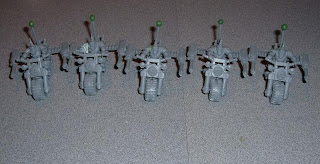
Even drilling on the flat spot, it was tricky to keep the balls centered - I re-shaped the profile of a few of them with my files:

The next step was to remove the insignia from the front of the bikes - while I could have done this with a lot of slow work with my hobby knife & files, I opted to fire up my new rotary tool to make short work of it:


The "de-insignia'ed" bikers:

...even though the rotary tool gives pretty good results, I still needed to clean up the bikes a bit with my files to level the spot off:

To replace the insignia with something suitable for Freebootas, I went with the skulls I made using my homemade Green Stuff press molds:

...and here are all the bikers with their new insignia:
 (click to embiggen)
...next I be working on some details for the antenna finials and another suitably "pirate-y" touch...
 The first thing I did was to clip off the emblems from the antennas:
...then I took some balls of Green Stuff I had made a few days previously (I stuck them down to a piece of tape while they were drying, so they wouldn't roll away):

I took my pin vise and drilled halfway through the balls - I realized after the first couple that there was a small "flat spot" on each one where they had sat while drying, and it was easier to keep the hole centered if I drilled there:

...then I topped the antennas with them:


Even drilling on the flat spot, it was tricky to keep the balls centered - I re-shaped the profile of a few of them with my files:

The next step was to remove the insignia from the front of the bikes - while I could have done this with a lot of slow work with my hobby knife & files, I opted to fire up my new rotary tool to make short work of it:


The "de-insignia'ed" bikers:

...even though the rotary tool gives pretty good results, I still needed to clean up the bikes a bit with my files to level the spot off:

To replace the insignia with something suitable for Freebootas, I went with the skulls I made using my homemade Green Stuff press molds:

...and here are all the bikers with their new insignia:
 (click to embiggen)
...next I be working on some details for the antenna finials and another suitably "pirate-y" touch...
Saturday, September 4, 2010
Making Custom Green Stuff Press Molds
I decided I wanted to have some unifying insignia across the Freeboota army I'm building, but I was not crazy about the idea of building the same elements out of plasticard or sculpting them out of Green Stuff dozens of times. I thought about casting them, given my recent experiences - but the resin & other supplies are a bit pricey, and I didn't want to sink a ton of money into this project. I started looking for other options and found this great tutorial over at Capture and Control - I decided if it worked for GW bits, then there's no reason it shouldn't work for something I custom made. I started by sketching a basic design on a scrap of plasticard with a technical pen:

Then I cut out the Orky skull with some scissors, and did the fine cuts with my hobby knife:


For the eyes & nose, I cut a triangle from platicard, then used my cutters to clip off just the corners:

To apply these to the skull, I put some superglue on a scrap of plasticard, then dipped a toothpick in to put a few dots of glue on the skull:

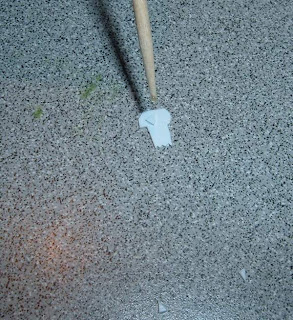
To easily pick up the triangles, grab a fresh toothpick and touch it to your tongue, then pick up the triangle and place it where you want it.
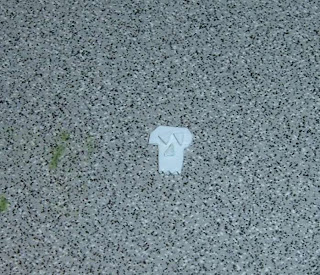
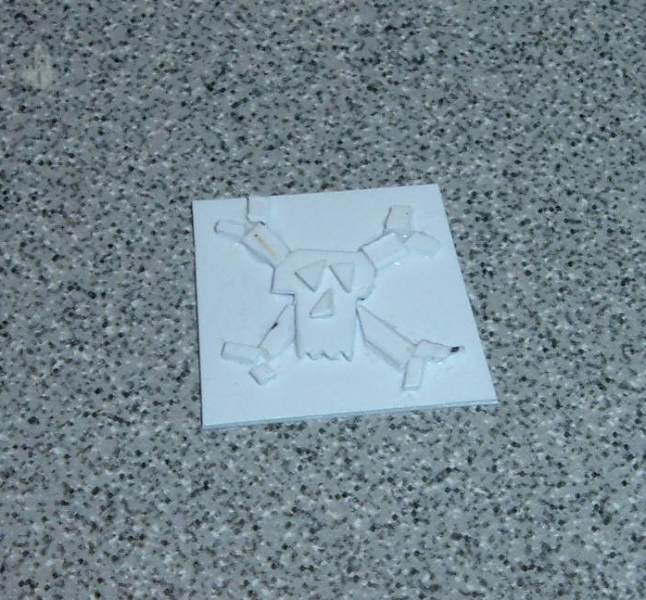
I glued the skull down to a piece of plasticard...
 ...and I made the "crossbones" and glued them down:

Since I was working on a very small scale and there was a lot of excess glue, while it was still wet I grabbed one of these cool little micro brushes I picked up to spread the excess glue out thin, so it wouldn't spoil the impression for the mold:

Then I cut the whole thing down to just a bit larger than the design:

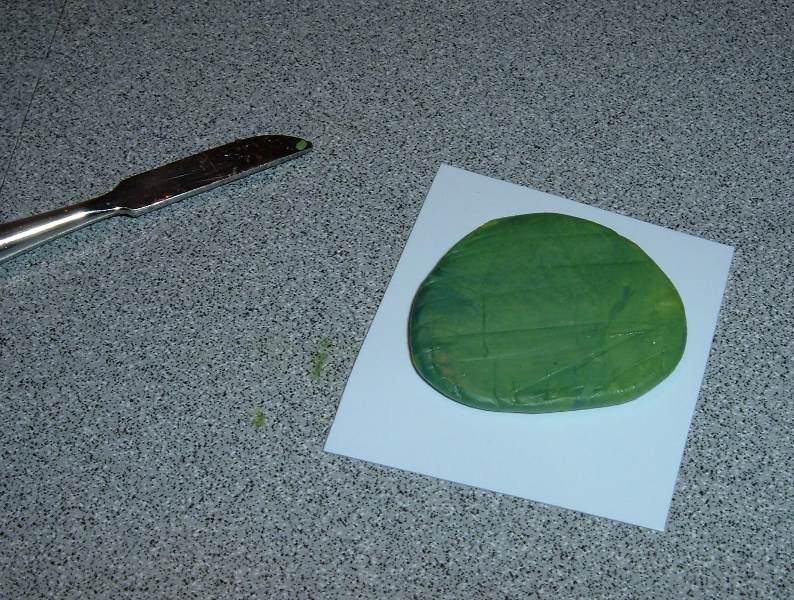
Now, I'm ready to make the mold: I grabbed my Green Stuff and mixed some up:


I stuck the ball of Green Stuff down to another scrap of plasticard. Using a sculpting tool lubricated with water, I spread it out flat & smooth, but still left it a bit thick:


To lubricate the mold (so I can remove the original piece), I grabbed my Chapstick. I just spread some on the tip of my finger, then spread it on the surface of the Green Stuff:


Then I pressed the original into the Green Stuff, using even pressure:

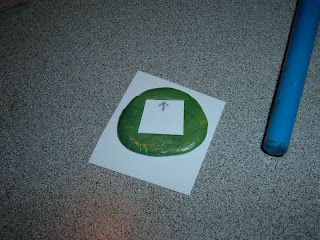
(I realized I didn't mark which way was the top, so I did that before I forgot). I made a "channel" in the Green Stuff, to make removing the original piece easier:

After letting the Green Stuff dry for a couple of hours, I carefully pried the original piece out of the mold:

Since most Ork vehicles & structures are covered with random armor plates, I decided that would be a useful application for this piece - so I grabbed a scribe and poked holes around the perimeter of the imprint. These will look like rivets on the molded piece:

At this point I let the press mold dry overnight. The next day I was ready to try it out - I put a small amount of petroleum jelly on a cotton swab and coated the surface of the mold:

Then I mixed up some Green Stuff and pressed it into the mold, trying to get it as level as possible with the surface of the mold:

After letting the Green Stuff dry for a couple of hours, I carefully pried the copy out of the mold:

I trimmed the excess off the piece & washed off the petroleum jelly:


...and now I have custom armor plates for my Ork vehicles!

This is a pretty easy way to add a lot of custom touches to an army, as well as a great use for leftover Green Stuff - I keep the molds on my desk and whenever I have extra Green Stuff, I'll mold a few pieces and when they're done I throw them in a baggie for future use.
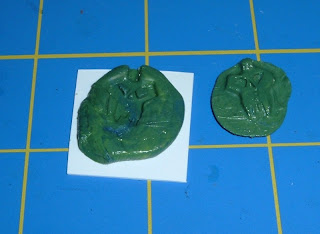
This method also works great for factory bits - after I broke the hood ornament off my Trukk model three times, I decided it would be better utilized for a press mold:


(I glued a scrap of plasticard to the back, so the Green Stuff wouldn't squish all the way through the holes for the eyes & nose.)



These will be great on smaller vehicles and as small accents.

Then I cut out the Orky skull with some scissors, and did the fine cuts with my hobby knife:
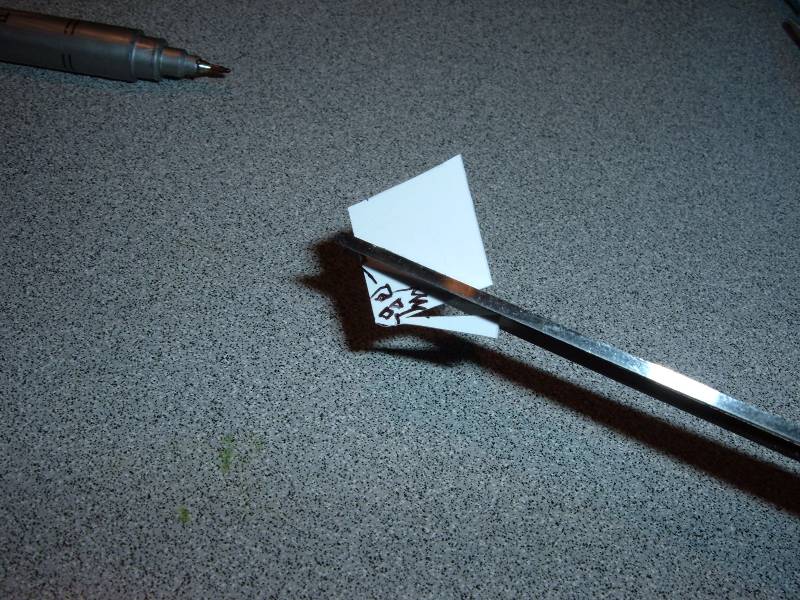


For the eyes & nose, I cut a triangle from platicard, then used my cutters to clip off just the corners:

To apply these to the skull, I put some superglue on a scrap of plasticard, then dipped a toothpick in to put a few dots of glue on the skull:


To easily pick up the triangles, grab a fresh toothpick and touch it to your tongue, then pick up the triangle and place it where you want it.

I glued the skull down to a piece of plasticard...
 ...and I made the "crossbones" and glued them down:
Since I was working on a very small scale and there was a lot of excess glue, while it was still wet I grabbed one of these cool little micro brushes I picked up to spread the excess glue out thin, so it wouldn't spoil the impression for the mold:

Then I cut the whole thing down to just a bit larger than the design:
Now, I'm ready to make the mold: I grabbed my Green Stuff and mixed some up:


I stuck the ball of Green Stuff down to another scrap of plasticard. Using a sculpting tool lubricated with water, I spread it out flat & smooth, but still left it a bit thick:

To lubricate the mold (so I can remove the original piece), I grabbed my Chapstick. I just spread some on the tip of my finger, then spread it on the surface of the Green Stuff:

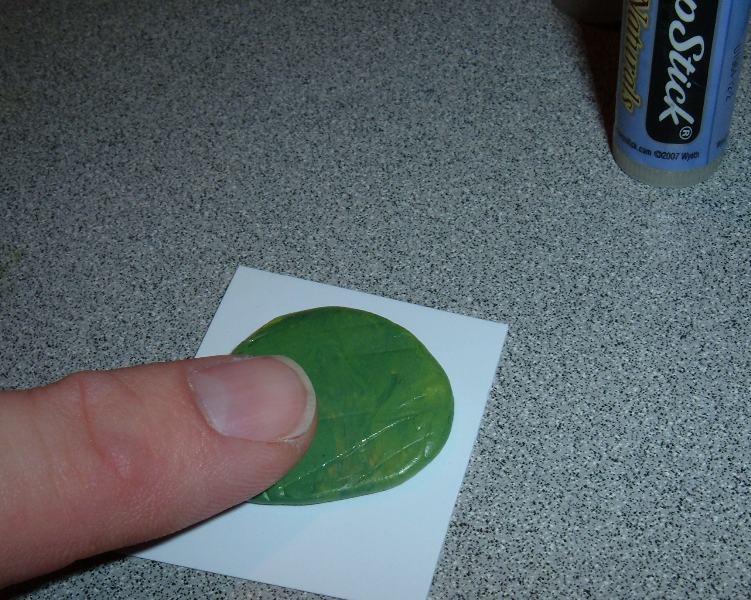
Then I pressed the original into the Green Stuff, using even pressure:


(I realized I didn't mark which way was the top, so I did that before I forgot). I made a "channel" in the Green Stuff, to make removing the original piece easier:

After letting the Green Stuff dry for a couple of hours, I carefully pried the original piece out of the mold:

Since most Ork vehicles & structures are covered with random armor plates, I decided that would be a useful application for this piece - so I grabbed a scribe and poked holes around the perimeter of the imprint. These will look like rivets on the molded piece:

At this point I let the press mold dry overnight. The next day I was ready to try it out - I put a small amount of petroleum jelly on a cotton swab and coated the surface of the mold:

Then I mixed up some Green Stuff and pressed it into the mold, trying to get it as level as possible with the surface of the mold:

After letting the Green Stuff dry for a couple of hours, I carefully pried the copy out of the mold:

I trimmed the excess off the piece & washed off the petroleum jelly:


...and now I have custom armor plates for my Ork vehicles!

This is a pretty easy way to add a lot of custom touches to an army, as well as a great use for leftover Green Stuff - I keep the molds on my desk and whenever I have extra Green Stuff, I'll mold a few pieces and when they're done I throw them in a baggie for future use.
This method also works great for factory bits - after I broke the hood ornament off my Trukk model three times, I decided it would be better utilized for a press mold:


(I glued a scrap of plasticard to the back, so the Green Stuff wouldn't squish all the way through the holes for the eyes & nose.)


These will be great on smaller vehicles and as small accents.
Subscribe to:
Posts (Atom)