Thursday, September 30, 2010

Freeboota Warboss Conversion

...so one of the good points of the Ork army I'm planning on building is that I can pick up a lot of the models on the cheap from people who are splitting up Assault on Black Reach starter sets on eBay.  But one of the bad points of this is that the Black Reach models have a very distinctive look - if I'm going to use multiples of the same models, then it's going to take some serious converting to make them all look unique.  Well, that's kind of the point of all this, so I better get started...

For a reference, here's an unconverted Black Reach Warboss that I built a couple of months ago:


No, no, no.  This is all wrong.  For starters, my Freebootas don't use shotguns or the standard Slugga, and the bosspole is all wrong.  To start fixing this, I grabbed the Warboss backpack & some Razig weapons from Reaper:


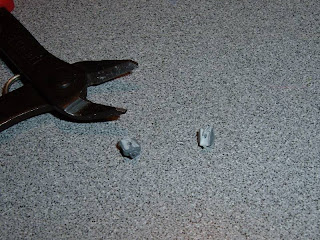
I started by chopping the shotguns and the bosspole off of the backpack:


...then I grabbed some flintlock pistols and chopped them down, and drilled out the spots for the pistols & bosspole on the backpack:


...then I cut the bits from the original bosspole and rearranged them:


Then I glued the flintlock pistols into the backpack.  I also replaced the original pole with the harpoon from the Razig weapon pack, and added the original bosspole details to it:


The Slugga wasn't the right look - I decided my Warboss needed a musket.  I started by removing the Slugga from his hand:


...then I shaved all the pieces from his hand (this was a major pain - if I had any other Ork arms that were a similar scale, I would've started with an empty hand instead).  Then I drilled out his fist, cut the musket in half, filled the hole with Green Stuff and glued the musket in his hand:


Next, I decided that a "Power Klaw" wasn't right for my Freeboota Warboss - my Warboss would have a Power HOOK.  (Remember, Ork technology just works, okay?)  I started by chopping off most of the original Power Klaw:


Then I took some plasticard and started building up the arm:


I punched out some circles with my tiny hole punch, and used them to make some nice Orky rivets:


For the hook itself, I used some Chaos Marauder bits I got from eBay:


...mainly what I'm concerned with are the"hooks" at the end of this banner - I removed them with my hobby knife:


I decided that my "Power Hook" was going to need more wiring than the standard, so I drilled some holes to allow for this:


Next I glued the hook to the arm:


I needed something in the appropriate scale to represent the hydraulic hose I wanted to add to the Power Hook - I went and grabbed an extra set of guitar strings I had on hand:


I cut a small piece and wrapped it around the barrel of a pen to give it the proper "bend" without kinking it:


...then I glued the ends into the holes I had drilled:


Originally I thought about having two hooks on the arm, but I didn't like the way it looked when I mocked it up.  This resulted in what I thought was too much "empty space" at the top of the arm, so I decided to fill it with another one of the Chaos Marauder bits:


...after several weeks of impatiently waiting, I received my Pirate Ork Heads from MaxMini:


I decided to go with this head for my Warbosses:


(I'm going to use the heads with the bicorne hats for my HQ, and the one with the metal jaw fits better with the look of the Black Reach Warboss model).  Here he is after a quick coat of primer through my airbrush:


...In addition to the above, I didn't take pics of a lot of little details - a lot of the extraneous spikey bits were shaved from the torso & boots, and the legs/boots were re-sculpted like I did in this post).  Overall I'm really pleased with how he came out - I hope the rest of them come out this well...

Tuesday, September 28, 2010

I'm In Ur Castle, Killin Ur D00dz

(Funky camera phone effect courtesy of FxCamera for Android)

Hey all -

     Had a D&D game on Sunday, and got a chance to play with my new cleric.  It was pretty laid back (we lose one of our regular players to football season every year, and another plays via webcam and wasn't able to join us, so it was just three of us + 1 NPC and the DM).  It just occurred to me that it was the first time in a loooong time that I've actually played with a model I painted

In other news, the Tyranids from my copy of Space Hulk are pretty much done, and ready for clearcoat:


...I'm gonna do my best to finish painting the Blood Angels in the next couple of weeks, since my wife is going out of town later this month - some of the guys have been talking about having a board game day, and when I mentioned that I miiiiight be finished with Space Hulk in time, some ears definitely perked up.  It's iffy, since the Blood Angels are a LOT more detailed than the Genestealers (which took me a month), but I also plan to use the airbrush a lot more, so hopefully that will help.

I also got my awesome Pirate Ork Heads from MaxMini:


I was seriously chomping at the bit to get these - I haven't checked the mail so much since I was a kid and used to send away for stuff with cereal box tops.  Literally an hour after I emailed Przemek at MaxMini to tell him I was ready to give up hope, I got a package slip from the post office.  Needless to say, I was standing outside the post office at five minutes 'till 9:00 this morning, waiting for them to unlock the doors.  They look absolutely fantastic & line up perfectly with the GW models, so now the Freeboota conversions can begin in earnest.  Stay tuned!

Friday, September 24, 2010

Magnetic Scenic Display Base

While finishing my Cleric model for my monthly D&D game, I decided I'd like to have a scenic display base for him.  I had one that I started on from a basing class I took at GenCon with Aaron Lovejoy, but I wasn't thrilled with it:

I decided I would try to salvage it.  (This won't exactly be a tutorial, since I don't have pics from the initial phases of making the base, but there should be some stuff here that you can apply to other projects).  The basic construction of the base started with a wooden block.  Aaron cut some wooden thread spools in half, and we superglued those to the blocks.  We then covered the whole deal in Milliput sculpting putty, to create the effect of a stone pedestal.  Unfortunately the edge of my pedestal was pretty uneven and the "bricks" I carved around the edge of the pedestal were not at all symmetrical.  To remedy this, I started by covering up the whole top with Green Stuff:

Then I took some sandpaper and gave it a rough sanding:

Next I took a spare base, and used my rotary tool to grind out the edges of the slot on the underside:

...then I superglued a washer to the underside of the base:

Next I took some neodymium magnets and arranged them evenly around the washer:

I took a technical marker and "drew" all over the surface of the magnets, just to get them covered in ink.  Then I lined up the base over the pedestal and pressed it down, leaving marks where the magnets will go:


...then I used my pin vise to drill out the holes.  I had to use my hobby knife to enlarge the holes a bit, since my drill bit wasn't quite big enough:


I put a drop of superglue into each hole, and slid the magnets into the holes using the blade of my hobby knife:


I took a scrap of my thinnest plasticard, and traced around the top of the pedestal, and cut it out:


I glued it to the top of the pedestal (using a generous amount of gap-filling superglue), then went to work on it with my files to blend the edge:


(The magnets are strong enough that they will still hold through the plasticard - it won't be super strong, but enough to keep the model from falling off if it's bumped).  Next I decided to start work on the figure base itself - I started by covering the top of the base in Green Stuff, and using my hobby knife I carved a rough cobblestone pattern in it:


Next I put the base on top of the pedestal, and rolled out a thin "rope" of Green Stuff to fill the gap around the edge:


I smoothed the Green Stuff into the gaps with my sculpting tool and evened out the edge of the pedestal, working the excess downward, since I already had a hard edge along the bottom that I could use as a guide to trim the excess.  When it looked good, I removed the base and cut off the excess Green Stuff:


After everything had dried thoroughly, I put the base back on the pedestal and sanded them together to get it smooth and make it look as much like one piece as possible:


The whole piece was primed white:


Then I gave it a coat of P3 Bloodstone, and a heavy wash of GW Devlan Mud:


Next I gave it a quick drybrush with a mix of P3 Bloodstone / GW Skull White, painted the wooden block with Vallejo Game Color black, added a few spots of static grass in the cracks, and mounted my model to the base:


 ...and that's pretty much it.  This project would be significantly simpler if it was a model that was going to be for display only - you could mount the model directly to the pedestal, or just use a dowel rod and glue the base directly to the top to make the pedestal shape.