picture from Armorcast
...needless to say, I thought that was pretty cool. Around this time I had also picked up the Karchev the Terrible warcaster model from Privateer Press, and was excited about painting it - I decided that I'd pick up some of the cinematic effects and give them a try with the Karchev model. Before leaving Adepticon I stopped by the Armorcast booth and picked up a couple of the Large Smoke Plumes.
Here's the smoke plumes right out of the package:
...and here's the built Karchev model:
Hmmm. Most of the warjacks have a single exhaust stack at the top, but Karchev has six, three on each side- the smoke plumes aren't going to work as-is. To solve this, I took my hobby saw and cut the smoke plumes down to the approximate width of the row of smokestacks:
Then I sunk some pins into the smokestacks, and drilled out the smoke plumes:
I mixed up some Green Stuff and sculpted the area where the plumes joined the smokestacks:
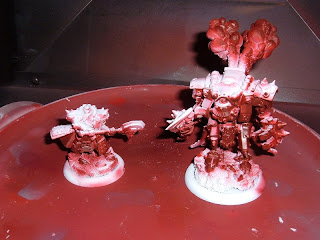
After the model was primed, I painted the reds with my airbrush, as seen in my zenital airbrushing tutorial:
I used the airbrush with some oranges & yellows to fade the appropriate colors into the recesses of the smoke plumes:
To do the "outermost" part of the smoke plumes, where they would be the darkest, I turned to Forge World's "Black Soot" weathering powder:
I mixed it with some water and applied it to the spots where I didn't want any color to show through at all:
Then, I applied the dry powder with a brush where I wanted it to be somewhat transparent:
I had had problems before with the weathering powders getting where I didn't want them, so I decided to fix them before moving on to the rest of the model. I masked the rest of the model off with an old shopping bag and applied some Krylon matte varnish:
Oh no, what's this?!?!
I had the dreaded "white fuzz" appear on the smoke plumes immediately. It actually happened right before my eyes - I think the weathering powder was absorbing all the propellant/medium in the varnish almost instantly, making the varnish dry too fast. (I was spraying indoors, and I've never had a problem with this matte varnish before). I tried re-coating it, with similar results - after looking around online and talking to some people via Twitter, I used a paintbrush dipped in mineral spirits to remove the fuzz:
Then I gave the smoke plumes a coat of Testor's Dull Kote, which I usually abhor:
Okay, crisis averted. Unfortunately I lost some of the color on the smoke plumes during that little fiasco, and I had to spend some time touching them up with some more orange & some yellow ink. Now at least I could move on to painting the rest of the model.
I started by giving the whole model a wash of 50/50 Baal Red/Devlan Mud:
Then I started adding the colors, mostly the black & metallics:
...about this time the freakin' model broke on me AGAIN, in a spot that had already been pinned AND epoxied (those annoying fringe "skirts" around the back). This time I resorted to JB Weld and a clamp to repair it:
...the pictures of the painting process get kinda sparse around here, since the clearcoat fiasco & the breakage cost me a couple of days, and I was rushing to get done. Mostly it consisted of finishing the weapons, face, and painting a billion brass rivets.
Since I'm doing a winter theme for the bases on my Khador models, I bought these cool little icicles from Dragon Forge Designs:
I cut a small section and glued them to the side of the base:
(I realized later that I actually glued these on backwards, since there was a big nasty vent mark on the section I chose - oh well). I wasn't concerned about cleaning up the top edge of the icicles, since I was planning on covering it with snow effects from Secret Weapon Miniatures:
...another cool item I picked up from Dragon Forge with this model in mind was this cool large resin display plinth:
After giving it a scrub, I gave it a couple coats of GW Chaos Black Spray:
Then a quick spray with some Dull Kote:
After everything was done, I pulled out the light box & good camera for a photo shoot:
Finished pics:
Overall I'm fairly pleased with how he came out, although I didn't get to do everything I wanted - my original plan was to do his weapons with non-metallic metals, and I would have liked to have tried some OSL effects from the fire like in the Armorcast product photo, but I just ran out of time. Building the model was an exercise in frustration (there are more pins in that model than in Evel Kinevel's spine) and it broke on me multiple times when I was handling it during painting. That, plus the complications with the varnish, plus the fact that it's become pretty obvious that Karchev is not going to be my warcaster of choice for my Khador force (The Butcher & Sorscha are both too good) meant that I was ready to be done with this model...


Another great tutorial, thanks!
ReplyDeleteYour tutorial on casting resin bases is also superb. I now have an endless supply of scenic bases ;-)