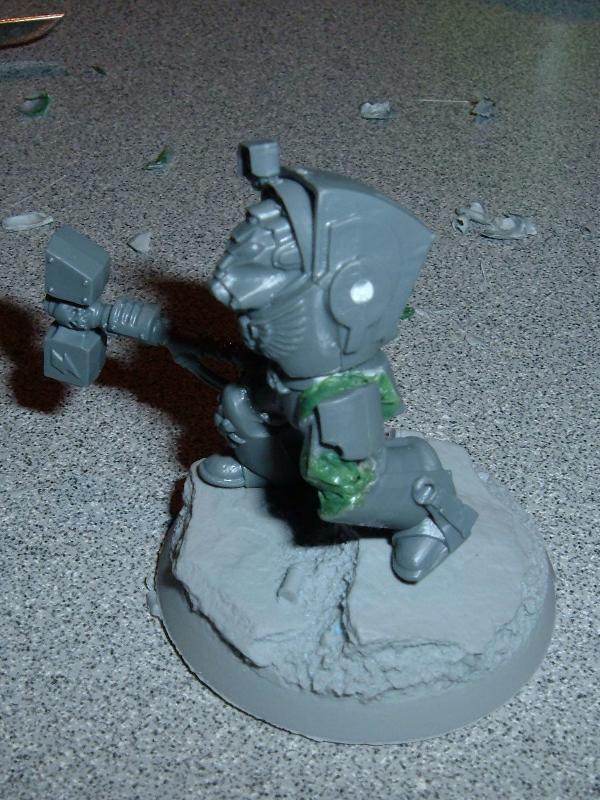
I was on a side of town that I don't usually get to today, so I stopped by the hobby shop over there. I wound up picking up a Terminator Librarian for my Grey Knights:
...I was actually somewhat interested in picking up one of these in "Finecast", since it's really the only GW model that's definitely been on my shopping list for a while. But, this store apparently didn't get the memo about Finecast - they only had one Finecast model in stock (an Emperor's Champion, which I already have in metal) and everything was still at the old prices, so I grabbed it. (It's primarily a train/RC model-oriented shop, so I wasn't entirely surprised...)
Showing posts with label Marines. Show all posts
Friday, July 22, 2011
Monday, February 28, 2011
Another Termie Re-Pose
I worked on another Terminator for my Black Templars today - I'm doing my best to make a squad of dynamic-looking Assault Terminators out of the dull-as-dishwater Assault on Black Reach Terminator sprues. This one will be a lot more subtle than the last one - unfortunately, that doesn't mean it's less work, as you'll see...
Here's my starting point, an AoBR Terminator:
After basic assembly, I cut off the right leg:
Then I cut the left leg at the knee:
I trimmed the left leg and jammed a bunch of Green Stuff in there for the time being:
I set the legs in place with Green Stuff, then let it get a bit tacky so I could play with the pose:
Then I started refining the re-sculpting of the legs a bit:
I pre-assembled the left arm, Forge World shoulderpad, & Storm Shield, since I knew space was going to be tight due to the pose:
The I added a Black Templars Terminator crest:
Then I played with the pose until i got it where I wanted it:
The new pose actually takes advantage of the Dragon Forge base, with the Terminator having his feet on different levels:
Final assembly:
It still needs a bit of sanding after the Green Stuff fully cures, but here's the mostly finished product:
...it's actually a very subtle change, and mostly only noticeably different from the originals when it's side-by-side with them, but I think it makes a big difference...
Here's my starting point, an AoBR Terminator:
After basic assembly, I cut off the right leg:
Then I cut the left leg at the knee:
I trimmed the left leg and jammed a bunch of Green Stuff in there for the time being:
I set the legs in place with Green Stuff, then let it get a bit tacky so I could play with the pose:
Then I started refining the re-sculpting of the legs a bit:
I pre-assembled the left arm, Forge World shoulderpad, & Storm Shield, since I knew space was going to be tight due to the pose:
The I added a Black Templars Terminator crest:
Then I played with the pose until i got it where I wanted it:
The new pose actually takes advantage of the Dragon Forge base, with the Terminator having his feet on different levels:
Final assembly:
It still needs a bit of sanding after the Green Stuff fully cures, but here's the mostly finished product:
...it's actually a very subtle change, and mostly only noticeably different from the originals when it's side-by-side with them, but I think it makes a big difference...
Friday, February 11, 2011
Black Templar Complications
...so since I've gathered all the bits for the Black Templars army I bought and I've started stripping paint in earnest, I thought I would sit down and maybe start building a few models. One problem presented itself, though: most of the models I bought appear to have come from the Assault on Black Reach box set. While they're great sculpts and I have no problem with the quality, for the troops & terminators the arms are sculpted as one piece - the shoulder pads aren't separate. That makes it kinda hard to swap out the shoulder pads for all the custom Black Templar ones I bought. D'oh!
No worries, though - I had already bought a couple sets of the Black Templar tabard-front torsos from a bitz seller:
I already have plenty of Space Marine torsos & arms in my bitz box, so I went back to my bitz seller and ordered a dozen or so legs, so that should give me the bulk of my Crusader Squads, along with the Scouts I already built. I can shave the pre-molded icons from some of the Black Reach troops, and replace them with the Templar crosses from the Forge World eteched brass sheet I ordered. The pricier proposition is turning out to be the Terminators - originally I was going to have quite a few terminators in this army, and I wanted them to all have the custom Templar shoulder pads too - same deal, most of them are Black Reach models and the arms are molded as one piece. I also wanted a squad of Assault Terminators, so I bought the Thunderhammers, then I bought the Forge World shields... and realized I didn't have any shield arms. Luckily, Space Wolf shields are way cheaper than the plain ones, and all I need are the upper arms, so I bought a set of those. Ideally I'd like to get five or six each of the bolter arms & power claw arms, but I'm not having much luck finding them cheap - most bitz sellers sell the entire arms sprue for twenty-five bucks. I may need to head to beg some friends for parts...
No worries, though - I had already bought a couple sets of the Black Templar tabard-front torsos from a bitz seller:
I already have plenty of Space Marine torsos & arms in my bitz box, so I went back to my bitz seller and ordered a dozen or so legs, so that should give me the bulk of my Crusader Squads, along with the Scouts I already built. I can shave the pre-molded icons from some of the Black Reach troops, and replace them with the Templar crosses from the Forge World eteched brass sheet I ordered. The pricier proposition is turning out to be the Terminators - originally I was going to have quite a few terminators in this army, and I wanted them to all have the custom Templar shoulder pads too - same deal, most of them are Black Reach models and the arms are molded as one piece. I also wanted a squad of Assault Terminators, so I bought the Thunderhammers, then I bought the Forge World shields... and realized I didn't have any shield arms. Luckily, Space Wolf shields are way cheaper than the plain ones, and all I need are the upper arms, so I bought a set of those. Ideally I'd like to get five or six each of the bolter arms & power claw arms, but I'm not having much luck finding them cheap - most bitz sellers sell the entire arms sprue for twenty-five bucks. I may need to head to beg some friends for parts...
Wednesday, February 9, 2011
New Models
Picked up some new models today:
...this will be the last of five Battlewagons (yay!) and the first of three Land Raider Crusaders - even though they're a huge points sink, I think I'm going to max out my Templars list with 'em, just 'cause I like the models so much. I also bought the Black Templar door kits, some Forge World brass, and even some armored plates from Scibor Miniatures. Since I'm going to spend so much time on the outside, I think this time I'll pay some extra attention to the inside - usually I just glue the ramps shut and lock down every moving part. I think some magnets are in my future...
Friday, February 4, 2011
Forge World Goodies!
Got a package in the mail today:
Yay! I've come to love packages with customs labels on them - it usually means that resin-y goodness that I've been waiting ages for has finally arrived. Apparently this package gave them some trouble, though, because they saw fit to beat the living hell out of it:
...oh well, everything was in there & undamaged, so I guess I'll let it be. So what's in it?
...some Black Templar Terminator shoulder pads:
Some Storm Shields (I'm really looking forward to building the Assault Terminators for this army):
...some brass etch:
...and some Black Templar icons:
...now, the problem with the above icons is that the picture on the Forge World site shows them all trimmed & ready use:
...this implies to me that the pieces would be on a sprue, and with a little clipping would be ready to go. That's not the case - the icons are just sculpted & cast as a slab:
...those aren't the paper-thin bits of resin that easily snap away surrounding the icons - they're a uniform thickness all the way through, which means I can't use these unless I painstakingly trim them out... as fun as that sounds, I may have to forgo using these as I planned, and just stick with the bitz from the chapter upgrade sprue & the etched brass...
Yay! I've come to love packages with customs labels on them - it usually means that resin-y goodness that I've been waiting ages for has finally arrived. Apparently this package gave them some trouble, though, because they saw fit to beat the living hell out of it:
...oh well, everything was in there & undamaged, so I guess I'll let it be. So what's in it?
...some Black Templar Terminator shoulder pads:
Some Storm Shields (I'm really looking forward to building the Assault Terminators for this army):
...some brass etch:
...and some Black Templar icons:
...now, the problem with the above icons is that the picture on the Forge World site shows them all trimmed & ready use:
...this implies to me that the pieces would be on a sprue, and with a little clipping would be ready to go. That's not the case - the icons are just sculpted & cast as a slab:
...those aren't the paper-thin bits of resin that easily snap away surrounding the icons - they're a uniform thickness all the way through, which means I can't use these unless I painstakingly trim them out... as fun as that sounds, I may have to forgo using these as I planned, and just stick with the bitz from the chapter upgrade sprue & the etched brass...
Friday, December 10, 2010
Captain Sicarius
Got a Captain Sicarius model in the mail today:
It's been a while since I've built a metal Space Marine model - it was a pain. I broke off almost every piece of this model at least once after I glued it, but the sculpt has the "notch & stub" pre-molded at all the connection points, so it would be practically impossible to pin, even if you wanted to. It's a good thing this model didn't require any Green Stuff work, as I'm sure I would have broken off all the pieces again multiple times and thrown it across the room in frustration.
Regardless, it is a fantastic looking model, and I look forward to painting it!
After de-flashing & a good scrubbing. The configuration I chose has Sicarius wearing the helmet and holding a pistol. The configuration shown on the GW website is neat, but I wanted something that looked a little more like it represented an "on the battlefield" pose.
Mounted on base
Backpack / banner attached
Head attached
Done!
It's been a while since I've built a metal Space Marine model - it was a pain. I broke off almost every piece of this model at least once after I glued it, but the sculpt has the "notch & stub" pre-molded at all the connection points, so it would be practically impossible to pin, even if you wanted to. It's a good thing this model didn't require any Green Stuff work, as I'm sure I would have broken off all the pieces again multiple times and thrown it across the room in frustration.
Regardless, it is a fantastic looking model, and I look forward to painting it!
Wednesday, December 1, 2010
One Little, Two Little, Three Little Ultramarines...
I've been building Ultramarines for a couple of years now, and like a lot of players, I didn't really have any rhyme or reason to what I was building - I wasn't building a particular list. I started the hobby with a handful of models that lars4life generously donated to me, then I picked up the Assault on Black Reach box, and after that... well, I just bought what I thought looked cool. (Not that there's anything wrong with this method - you should always enjoy what you're building. It's just not a particularly cost-effective way to approach the hobby, especially if having a competitive list is one of your goals).
Well, I finally got around to figuring out the points for my models and started looking towards list building, and I was short some Ultramarines - three, in fact. Given that tactical squads are a maximum of 10 marines each, and I had 27 tactical marines. I decided to remedy this, and went to my bits collection - unfortunately, I had no legs. I resigned myself to buying some legs from an eBay bits seller, and a few days later these arrived in the mail:
...then I grabbed my leftover marine sprues, and started chopping parts off:
I just threw them all into a bag (I was on my way out the door) along with a large bag of bits I bought at a convention a couple of years ago:
After fiddling around with some options, here is what I wound up with:
The un-helmeted marine will be the Sergeant, and the other two will be troops. I'm glad I had an extra "beakie" marine head, I like to mix those in to keep things interesting...
Well, I finally got around to figuring out the points for my models and started looking towards list building, and I was short some Ultramarines - three, in fact. Given that tactical squads are a maximum of 10 marines each, and I had 27 tactical marines. I decided to remedy this, and went to my bits collection - unfortunately, I had no legs. I resigned myself to buying some legs from an eBay bits seller, and a few days later these arrived in the mail:
...then I grabbed my leftover marine sprues, and started chopping parts off:
I just threw them all into a bag (I was on my way out the door) along with a large bag of bits I bought at a convention a couple of years ago:
After fiddling around with some options, here is what I wound up with:
The un-helmeted marine will be the Sergeant, and the other two will be troops. I'm glad I had an extra "beakie" marine head, I like to mix those in to keep things interesting...
Friday, November 12, 2010
New Arrivals
Got some new models in:
...the next Battlewagon in the fleet, and a Space Marine Attack Bike. The Battlewagon came from my local shop, and the Attack Bike came from lars4life - he found a few models he had packed away that he had no desire to build & was going to put them on eBay, but he offered me first crack at them. He never got around to picking up the 5th edition rulebook, and I had an extra mini-rulebook from Assault on Black Reach, so I proposed a trade, and we both walked away happy. This works out great: I've cobbled enough bitz together for two bikers, and was actually planning to build an Attack Bike with them - but, now that I have the actual model, I can build the "for laughs" project that I mentioned in this post...
Monday, November 1, 2010
Project Funderhammer: My Contribution
So my buddy lars4life asked for people to provide their interpretation of a FUNderhammer, a term coined by his son that inspired the name of his blog. I know when I heard the term "Funderhammer", this was the first thing that popped into my mind:
...and here's my take on it:
I thought it came out pretty good - I need to talk lars4life into giving me an extra Tyranid, so I can model it post-impact, with "X"'s for eyes and little cuckoo birds & stars swirling around his head. (Is it obvious that I watched way too much Tom & Jerry as a kid?)
The hammer is pretty simple - it's made from a dowel rod and a wooden bit that I found a while ago at the craft store (I usually use these as barrels in terrain pieces). There was no real "converting" to speak of, except I had to chop the Terminator's hand up pretty good to make the hammer fit, and I wound up replacing a thumb & finger with ones I shaped out of bits of sprue. I chose a Black Templars scheme because I strongly suspect I'm going to do a Templars army someday - ever since painting my chaplain, I've loved the black/gray/gold color combination (and it doesn't hurt that it's dead easy to do once you suss out a few details). Overall it was a lot of fun to paint a mini purely for humor value - if models weren't so expensive, I'd do a lot more of these. I have a great idea for a Space Marine biker squad that's having mechanical problems...
...and here's my take on it:
I thought it came out pretty good - I need to talk lars4life into giving me an extra Tyranid, so I can model it post-impact, with "X"'s for eyes and little cuckoo birds & stars swirling around his head. (Is it obvious that I watched way too much Tom & Jerry as a kid?)
The hammer is pretty simple - it's made from a dowel rod and a wooden bit that I found a while ago at the craft store (I usually use these as barrels in terrain pieces). There was no real "converting" to speak of, except I had to chop the Terminator's hand up pretty good to make the hammer fit, and I wound up replacing a thumb & finger with ones I shaped out of bits of sprue. I chose a Black Templars scheme because I strongly suspect I'm going to do a Templars army someday - ever since painting my chaplain, I've loved the black/gray/gold color combination (and it doesn't hurt that it's dead easy to do once you suss out a few details). Overall it was a lot of fun to paint a mini purely for humor value - if models weren't so expensive, I'd do a lot more of these. I have a great idea for a Space Marine biker squad that's having mechanical problems...
Monday, August 2, 2010
Restocking Supplies, Librarian
Not much new today - I ran to the store and restocked some supplies, after last week's clearcoat-and-primer marathon:

(I picked up the basing sand on a whim - it was only $1.99 a bag at the craft store). I have a small container full of play sand in my terrain-building box, but I've been using the Woodland Scenics medium ballast on most of my bases for a while now. I'm thinking of trying something new for my Orks, which may involve casting my own resin bases. Stay tuned.
I also laid down the very beginnings of a basecoat on my last unfinished Ultramarine model, the chapter librarian:

(Yeah, he's got a ways to go...)
I'll be at GenCon this weekend - check back for photos & trip reports!
(I picked up the basing sand on a whim - it was only $1.99 a bag at the craft store). I have a small container full of play sand in my terrain-building box, but I've been using the Woodland Scenics medium ballast on most of my bases for a while now. I'm thinking of trying something new for my Orks, which may involve casting my own resin bases. Stay tuned.
I also laid down the very beginnings of a basecoat on my last unfinished Ultramarine model, the chapter librarian:
(Yeah, he's got a ways to go...)
I'll be at GenCon this weekend - check back for photos & trip reports!
Sunday, August 1, 2010
Updates: Space Hulk
So the last time I worked on my copy of Space Hulk, I assembled & de-flashed the minis, and started the Green Stuff work. Since I can finally see the light and the end of the tunnel with my Ultramarines (only the librarian is left), I decided to get back to it.

There were relatively few models that needed any green stuff at all - the 'nids only needed it because the top & bottom halves didn't snap together completely, and you could see daylight between the gap. Most of the Marines were probably just me being picky, with the exception of Sergeant Lorenzo - for some unknown reason, they saw fit to cast his cape in two halves, which meant it required pretty extensive work. Since we were supposed to get another week of record temperatures stating tomorrow, I was determined to get everything primered today:

My original plan was to prime the Marines in white and the 'nids in black, but my can of white ran out halfway through the Marines, so I guess I'll find out what it's like to paint black-primed Marines...
There were relatively few models that needed any green stuff at all - the 'nids only needed it because the top & bottom halves didn't snap together completely, and you could see daylight between the gap. Most of the Marines were probably just me being picky, with the exception of Sergeant Lorenzo - for some unknown reason, they saw fit to cast his cape in two halves, which meant it required pretty extensive work. Since we were supposed to get another week of record temperatures stating tomorrow, I was determined to get everything primered today:
My original plan was to prime the Marines in white and the 'nids in black, but my can of white ran out halfway through the Marines, so I guess I'll find out what it's like to paint black-primed Marines...
Saturday, July 31, 2010
New Orks, Finished Chaplain, Ultramarines
So I stopped by my FLGS today and picked up a few things:
...my Ork in Mega Armor & Painboy that I ordered came in, and while I was there I picked up the Gretchin w/ Runtherd box. I think I might just use the Gretchin entirely as fluff pieces, and convert them so they're hanging off the back of the vehicles, etc.
Here's my finished Chaplain:
(Hooray, I finally broke out my good DSLR to take pics, rather than the lousy seven-year-old point & shoot camera). Some thoughts:
-Highlights: Getting better, still not where I want to be. Part of the problem is that the highlights look good on the model, even up close, but since I tend to shoot my photos so close, it looks like I smeared them on with a cotton swab. I'm going to try a 5x0 brush to see if I can get them neater.
-Painting black: As I said in a previous post, I feel dumb for avoiding this model for so long, since I was anxious about painting black - turns out, it's dead easy on smooth, flat surfaces, such as power armor. (I'm sure black robes are a different story altogether). I used Citadel Adeptus Battlegray for the highlights on this model, but I'd like it a shade lighter - I picked up some Vallejo Game Color Ghost Grey tonight, hopefully that'll fit the bill.
-Painting metals: This was the first model where I based the chest emblem with successive layers of flat colors, then painted the Shining Gold on top, rather than putting the Shining Gold directly on the primer and washing - I think it really helps the tone of the metallics look more natural, but I still had to go back to a wash to get the "depth" I wanted in the cracks.
I wanted the handle of the Crozius Arcanum to have a "mottled" look like it was wrapped in burgundy leather, so I applied an intentionally uneven coat of red ink directly to the white primer, then gave it a coat of Vallejo glaze. I think it came out well.
Here's the paint scheme for the model:
Armor:
-Basecoated w/ Citadel Chaos Black
-Highlighted w/ Citadel Foundation Series Adeptus Battlegray
Silver Metallics (rivets, pack vents, skull emblems):
-Basecoated w/ Citadel Mithril Silver
Gold Metallics:
-Basecoated w/ Citadel Bestial Brown
-Built up w/ Citadel Scorched Brown
-Layered w/ Citadel Shining Gold
-Washed w/ Citadel Badab Black
-Drybrushed w/ Citadel Mithril Silver
Handle of Staff:
-Basecoated w/ Series P3 Red Ink
-Glazed w/ Vallejo Game Color Gloss Medium
Purity Seal Wax:
-Basecoated w/ Foundation Series Mechrite Red
-Washed w/ Citadel Devlan Mud
-Highlighted w/ Citadel Blood Red
Purity Seal Ribbons/Bandages:
-Basecoated w/ Citadel Bleached Bone
-Washed w/ Citadel Devlan Mud
Skull/Shoulder Pad:
-Basecoated w/ Citadel Scorched Brown
-Built up w/ Citadel Bleached Bone
-Washed w/ Citadel Badab Black
-Highlighted w/ Citadel Skull White
Eyes:
-Basecoated w/ Chaos Black
-Pupils basecoated w/ Citadel Blood Red
Book:
-Cover: Basecoated w/ Citadel Snakebite Leather, washed w/ Citadel Devlan Mud
-Chains: Basecoated w/ Citadel Mithril Silver, washed w/ Citadel Badab Black
-Pages: Basecoated w/ Citadel Bleached Bone, washed w. Citadel Devlan Mud
-Corners: Basecoated w/ Citadel Shining Gold, washed w/ Gryphonne Sepia
...and I FINALLY got an evening that was suitable to lay down some matte finish, after almost three weeks of record humidity. A whole lot of Ultramarines are now ready to join their comrades in the foam:
Here's my finished Chaplain:
-Highlights: Getting better, still not where I want to be. Part of the problem is that the highlights look good on the model, even up close, but since I tend to shoot my photos so close, it looks like I smeared them on with a cotton swab. I'm going to try a 5x0 brush to see if I can get them neater.
-Painting black: As I said in a previous post, I feel dumb for avoiding this model for so long, since I was anxious about painting black - turns out, it's dead easy on smooth, flat surfaces, such as power armor. (I'm sure black robes are a different story altogether). I used Citadel Adeptus Battlegray for the highlights on this model, but I'd like it a shade lighter - I picked up some Vallejo Game Color Ghost Grey tonight, hopefully that'll fit the bill.
-Painting metals: This was the first model where I based the chest emblem with successive layers of flat colors, then painted the Shining Gold on top, rather than putting the Shining Gold directly on the primer and washing - I think it really helps the tone of the metallics look more natural, but I still had to go back to a wash to get the "depth" I wanted in the cracks.
I wanted the handle of the Crozius Arcanum to have a "mottled" look like it was wrapped in burgundy leather, so I applied an intentionally uneven coat of red ink directly to the white primer, then gave it a coat of Vallejo glaze. I think it came out well.
Here's the paint scheme for the model:
Armor:
-Basecoated w/ Citadel Chaos Black
-Highlighted w/ Citadel Foundation Series Adeptus Battlegray
Silver Metallics (rivets, pack vents, skull emblems):
-Basecoated w/ Citadel Mithril Silver
Gold Metallics:
-Basecoated w/ Citadel Bestial Brown
-Built up w/ Citadel Scorched Brown
-Layered w/ Citadel Shining Gold
-Washed w/ Citadel Badab Black
-Drybrushed w/ Citadel Mithril Silver
Handle of Staff:
-Basecoated w/ Series P3 Red Ink
-Glazed w/ Vallejo Game Color Gloss Medium
Purity Seal Wax:
-Basecoated w/ Foundation Series Mechrite Red
-Washed w/ Citadel Devlan Mud
-Highlighted w/ Citadel Blood Red
Purity Seal Ribbons/Bandages:
-Basecoated w/ Citadel Bleached Bone
-Washed w/ Citadel Devlan Mud
Skull/Shoulder Pad:
-Basecoated w/ Citadel Scorched Brown
-Built up w/ Citadel Bleached Bone
-Washed w/ Citadel Badab Black
-Highlighted w/ Citadel Skull White
Eyes:
-Basecoated w/ Chaos Black
-Pupils basecoated w/ Citadel Blood Red
Book:
-Cover: Basecoated w/ Citadel Snakebite Leather, washed w/ Citadel Devlan Mud
-Chains: Basecoated w/ Citadel Mithril Silver, washed w/ Citadel Badab Black
-Pages: Basecoated w/ Citadel Bleached Bone, washed w. Citadel Devlan Mud
-Corners: Basecoated w/ Citadel Shining Gold, washed w/ Gryphonne Sepia
...and I FINALLY got an evening that was suitable to lay down some matte finish, after almost three weeks of record humidity. A whole lot of Ultramarines are now ready to join their comrades in the foam:
Thursday, July 22, 2010
Project: Scout Squad

(click to enlarge)
...so here's the Scout Squad, almost finished (still need to finish the basing & seal them). As I mentioned before, these models were forgotten about until I found them, partially finished, in a dark compartment in my modeling toolbox. The primer job was a bit "fuzzy" and the blue had been hastily basecoated with paint straight out of the pot, so they probably weren't the best models to start trying to up my painting game, but it is what it is - it actually worked pretty well, as I hadn't painted anything in months, and wasn't going to be too upset if it didn't go well. Some thoughts/observations about painting these:
-Wet blending: Unfortunately, Space Marines just aren't the best models for working on this technique. I did it a bit with the pants and thought it worked well (hard to pick out in the picture), but the armor, guns, etc. don't lend themselves to that method. I'm planning on picking up some more fantasy-oriented models to work on it.
-Highlights: One problem I've always had with my hard-line highlights is wanting that "'eavy Metal" style highlighting, but being too afraid of high contrast. I went much higher contrast with these models than I usually would, and am happier with it - the gray-on-black contrast looks great, but I think the light blue on the armor could even have gone a bit lighter. I also still struggle a bit with the brush control needed for these highlights, so I mixed a bit extra of my base color and used it to clean up the highlights that got away from me a bit.
-Faces: I tried basing in dark colors and "building up" from there, but it didn't work out as I'd hoped. I think I might just be too attached to washes & drybrushing for faces - the amount of extra work to do it the "proper" way doesn't justify the results, I think.
-Metals: I did, however, build up the metals from a dark, flat color, and thought it worked much better than my usual "slap on Shining Gold, slather on Gryphonne Sepia wash" method. I'll definitely use this on larger areas (chest emblems, etc.) in the future. It's too difficult to bother with on tiny pieces (glove/gun emblems, for example) in my opinion.
-Eyes: Bleeaaargh, they still give me fits. I've tried all the popular painting methods, technical pens, loupe magnifers, and more - they still come out cross-eyed half the time. I just need to keep practicing, I guess. The model on the far left was coming out great using the "base the eye socket in black / paint two white dots on either side of the socket" method, but I managed to screw it up somewhere along the way.
Here's the paint colors for anyone who's interested:
Entire Model:
-Primed w/ Krylon white primer
Pants:
-Based w/ Formula P3 Hammerfall Khaki
-Built up w/ Citadel Bleached Bone
-Highlighted w/ Citadel Skull White
Armor:
-Based w/ Citadel Foundation Series Mordian Blue
-Highlighted w/ Rackham Color Wizard Blue
Pouches/Holsters/Straps:
-Based w/ Citadel Snakebite Leather
-Washed w/ Citadel Devlan Mud wash
Silver Metals:
-Based w/ Citadel Scorched Brown
-Built up w/ Citadel Boltgun Metal
-Washed w/ Citadel Badad Black wash
-Drybrushed w/ Citadel Mithril Silver
Gold Metals:
-Based w/ Citadel Scorched Brown
-Built up w/ Citadel Shining Gold
-Washed w/ Citadel Gryphonne Sepia wash
-Drybrushed w/ Citadel Mithril Silver
Shell Casings:
-Based w/ Vallejo Model Color Brass
-Washed w/ Citadel Gryphonne Sepia wash
Boots/Gloves:
-Based w/ Citadel Chaos Black
-Highlighted w/ a 50/50 mix of Citadel Foundation Adeptus Battlegray & Skull White
Flesh:
-Based w/ Citadel Scorched Brown
-Built up w/ Citadel Dark Flesh
-Built up w/ Citadel Elf Flesh
-Washed w/ Citadel Baal Red wash
-Drybrushed w/ Citadel Elf Flesh
Hair:
Based w/ Citadel Chaos Black / drybrushed w/ Citadel Foundation Adeptus Battlegray
-or-
Based w/ Citadel Bestial Brown
-or-
Based w/ a 50/50 mix of Citadel Bestial Brown & Sunburst Yellow
Eye lens:
-Based w/ Citadel Blood Red
Pistol Scope:
-Based w/ Citadel Scorpion Green
-Hightlight blended w/ 50/50 mix of Citadel Scorpion Green & Skull White
-Flare highlight w/ Citadel Skull white
Entire model will be sealed w/Krylon #1311 Matte Finish.
Wednesday, July 14, 2010
TheLeadHead Joins FTW

I am proud to announce that The LeadHead has joined the FTW Blogger Group, a network of over six hundred dedicated 40K enthusiasts who cover every aspect of the hobby with their individual blogs. Head over there and check it out.
In other news, progress is coming along on the Scout squad, but it's sloooow. Going from ASAP assembly-line "gaming standard" painting to working with multiple layers, line highlighting & wet-blending is a BIG change. However, so far I'm moderately pleased (if not with the results, at least with the noticeable improvements to my technique) and hope to have some pics and a write-up by early next week.
Wednesday, July 7, 2010
And Then There Were Seven
So this is all that's left uncompleted out of a couple thousand points' worth of Ultramarines:
The Scout squad was completely forgotten, to be honest - I thought I was FINALLY done with everything that came in the last battlebox I bought, and when I was digging through my toolbox for something, I found them stashed in a small compartment. They're probably the last of my minis that are going to receive a relatively "quick 'n dirty" treatment to get them up to tournament standard. They require a bit more attention, however, since they're not wearing the standard power armor - I based the pants & shirt tonight in Formula P3 Hammerfall Khaki and am going to build it up to white highlights, as opposed to my usual "quick" method of basecoat white / Devlan Mud wash / drybrush white. Since none of them are wearing helmets, I also plan to try giving their faces (especially the eyes) a bit more attention than usual, since that's one of my weak areas.
The Chaplain & Librarian are models I always planned to give a bit more attention, mostly because they're gorgeous sculpts - I had my FLGS special order these particular models from GW Direct since I liked them so much. The Librarian has an insane amount of detail that's going to be a real challenge, and the Chaplain's color scheme is almost entirely black & white - the two most difficult colors to paint well, since they don't lend themselves to any of the traditional "shortcut methods" at all.
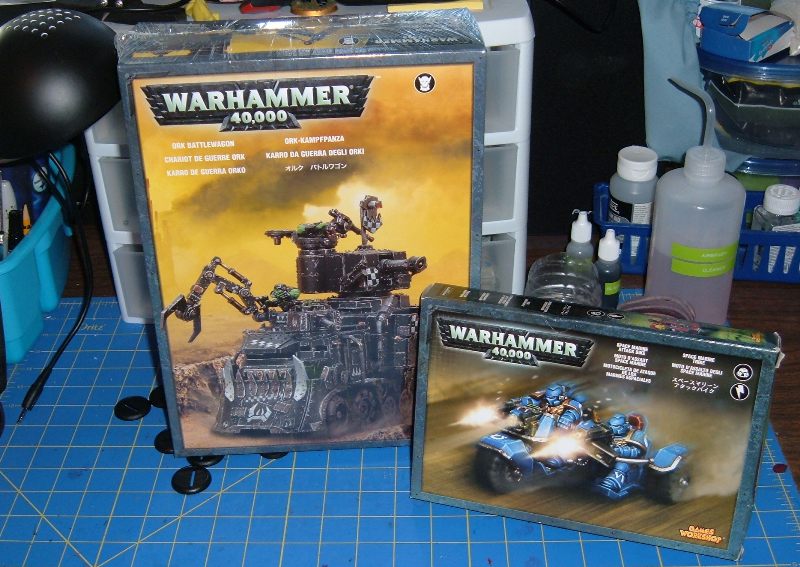
The Scout squad was completely forgotten, to be honest - I thought I was FINALLY done with everything that came in the last battlebox I bought, and when I was digging through my toolbox for something, I found them stashed in a small compartment. They're probably the last of my minis that are going to receive a relatively "quick 'n dirty" treatment to get them up to tournament standard. They require a bit more attention, however, since they're not wearing the standard power armor - I based the pants & shirt tonight in Formula P3 Hammerfall Khaki and am going to build it up to white highlights, as opposed to my usual "quick" method of basecoat white / Devlan Mud wash / drybrush white. Since none of them are wearing helmets, I also plan to try giving their faces (especially the eyes) a bit more attention than usual, since that's one of my weak areas.
The Chaplain & Librarian are models I always planned to give a bit more attention, mostly because they're gorgeous sculpts - I had my FLGS special order these particular models from GW Direct since I liked them so much. The Librarian has an insane amount of detail that's going to be a real challenge, and the Chaplain's color scheme is almost entirely black & white - the two most difficult colors to paint well, since they don't lend themselves to any of the traditional "shortcut methods" at all.
Subscribe to:
Posts (Atom)