As I mentioned in a previous post, one of the classes I took at Origins 2015 was building with Hirst Arts blocks. I've played with them a bit before, but I've never really detailed the process on the blog.
The instructor had a half-dozen or so pre-cast & bagged sets to choose from - I chose a set made from the cavern molds, as I thought it'd be the most versatile to have in my collection (as opposed to a set that was strictly sci-fi or fantasy -themed). Here's some pics of the instructor's assembled version:
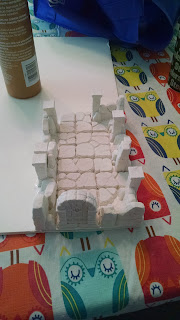
We were given a bag of pieces and a bottle of glue, and basically told to go to town while the instructor lectured on general tips & ideas. For some of the Hirst Arts molds, the pieces are very interchangeable and it's pretty much like building with LEGOs - there are a million different ways they can go together. The cavern molds are not one those types of sets - the instructor specifically indicated "there's pretty much only one way that set can go together". It was a bit frustrating at first without a schematic or anything, but eventually I sussed it out - here's the pieces I was able to get together during the class:
To finish the assembly, I was going to need a solid base. I packed up the pieces carefully, and when I got home I grabbed a piece of foamcore board:
Then I laid out what I had:
Then I started duplicating the layout based on the pictures I took in class:
After I was confident I had the layout right, I started gluing everything down:
The glue that seems to get recommended the most by folks who build with Hirst Arts blocks is Aleene's Tacky Glue, but wood glue or regular PVA ("school glue") will also work. Note: be generous with the glue - these blocks are cast from Hydrocal (lightweight gypsum cement) - they absorb a lot of moisture out of the glue. When I initially assembled a lot of the pieces I thought I was using plenty of glue, but when I picked up the pieces a half-hour later most of them snapped apart.
After gluing everything down well and letting it dry overnight, I used a utility knife to trim off the excess foamboard:
(I left the door piece separate, so it can be removed if needed during a game).
Next, I coated the edges of the pieces with glue and sprinkled them with kitty litter:
I did the same to cover any obvious gaps on the interior of the set, too:
After the litter had dried, I mixed some glue 50/50 with water and dripped it on the kitty litter, to really "lock in" the gravel.
...and that's it - coming soon, we'll paint it up!


