
...so I've been sitting on three Land Raider kits for a while now - I finally got a chance to build one, and decided to magnetize it.
(Quick explanation for my non-wargaming friends who follow my blog: Model kits often include several different weapon options that you can use. If you glue the model together, you're stuck with that weapon (no pun intended). Cheap-@$$ wargamers figured out a while ago that if we use magnets to attach the weapons, we can swap them out at will, rather than having to buy a whole new model kit to have different weapons. Got it? Okay.)
Step one: build a Land Raider, but don't glue on the weapons. (Sorry, I didn't document the early stages of building. It was uneventful anyway).
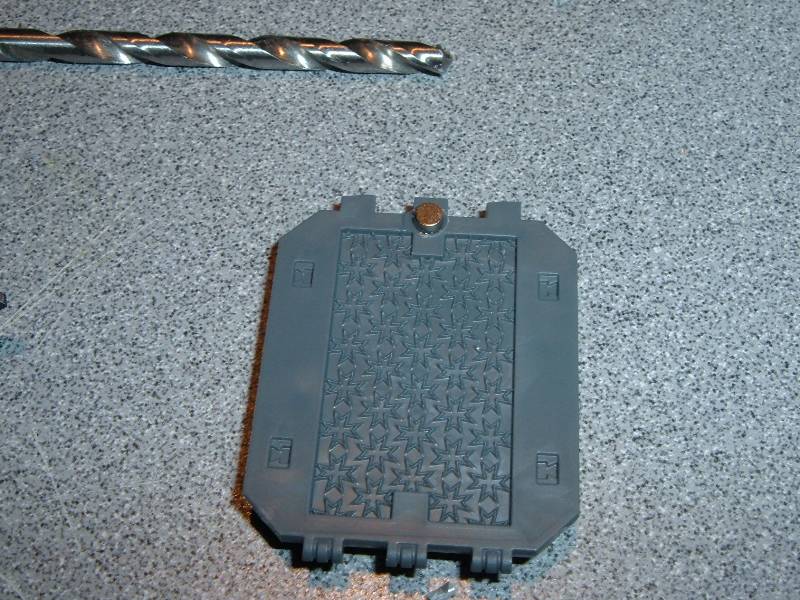
For this model, I bought the Black Templar hatch & doors from a bitz seller. I usually glue the doors down for simplicity's sake, but this time I decided to magnetize them so I could paint the cool interior details behind the hatches.
I started by drilling a hole at the top of the hatch:


Then I mixed up some Green Stuff:

I grabbed my neodymium magnets - these are 1/8" x 1/16". (I bought these a long time ago on eBay - I don't think the web site on the label is even active anymore).

Then I drilled a corresponding hole on the door - first I used a small drill bit and drilled about halfway through the door, then I used a large bit to open up the diameter of the hole, to make a "pocket" for the magnet to sit in:

Then I used superglue to attach the magnet to the door:
Then I squished some Green Stuff behind the hole on the Land Raider:

...and pressed a magnet into the Green Stuff from the front (making sure the right pole was facing out!)

After everything is dry, the door fits securely:

The other side received the same treatment:


Next, I magnetized the Assault Cannons - there's no real reason to magnetize these right now since no alternate weapons are included in the Crusader/Redeemer kit, but I might happen across a set of Heavy Bolters someday.


Next, I started on the rear hatch - this was trickier, because in order to get the magnets to line up with the turrets correctly but still remain hidden, one had to be in centered really close to the edge of the hole. I started by drilling the holes where I needed them:

Then I opened them up with one of my files:

I squished some Green Stuff underneath the first hole and inserted the magnet:

I added some Green Stuff underneath & to the side of the hole that was on the edge of the opening:

I inserted the magnet, then used a toothpick to smooth it a bit (this was after I absent-mindedly tried using my metal sculpting tool, and the magnet ripped out and attached itself to my tool - d'oh!)


Next I attached magnets to the Meltagun:


Then I built the gunner option:

He received a Black Templar head & shoulderpads:

After the magnets were attached:

Next, I wanted a "plain closed hatch" option - I don't expect to use this much, but I wanted to have the option anyway. The problem was, I didn't have any more of the turret rings - I found these parts left over from An Ork Battlewagon sprue:

I "de-Orkified" the turrent by shaving off the triangle-shaped edging, then kludged them together into a hatch assembly:

I had to trim away one edge of the bottom of the assembly, since it wouldn't clear the magnet properly - this won't be seen when it's attached:

It doesn't look fantastic or anything, but I'm betting once the model is painted it won't stand out much.

The Flamers
I did build the Flamers that came with this kit:

However, I didn't magnetize them right now for several reasons: First, the easiest way to do this would be to have a whole second set of the hatch inserts & sponson mounts. If you check around with the bitz sellers, a set of these is going for around $15, so I'd have close to twenty bucks in it after shipping costs, and that still wouldn't include the exterior armor plates. That's starting to not be a good value - I have three Land Raider Crusaders, and by the time I gathered the parts for all three, I could have just bought another model. While I could magnetize just the vertical sponson supports & the armor plates, I feel this would be way too fidgety. Also, since I'm a bit of a fluff bunny, and these Land Raiders are for my Black Templar army, I really can't see myself not running them as Crusaders, since the Templars were the chapter that originated the design. But, maybe I'll come across the parts I need on the cheap someday, so I thought I'd keep 'em around.
Next, I finished drilling out all the weapon barrels & cleaning up mold lines:


Then, I added lots of Templar-y goodness:
Forge World brass etch:


...and this cool decorated armor plate from Scibor:

With all the magnetized accessories:

With common load out:

Threatening my in-progress Freebootas!

I'm pretty happy with how it came out - the magnets are almost completely unnoticeable when the weapons are attached. I may not get around to building the others until after I get back from Adepticon, so I might have to look for additional bits while I'm there...


