I got the second Battlewagon in the fleet finished, and needed to make the Deffrolla (if you want the full-blown scratch-built Deffrolla tutorial, click here). I found something I thought might speed up the process a bit:
This is an assortment of styrene tubes, rods, & "girders" from Gale Force Nine. I mostly bought this as proof-of-concept - as I've mentioned before, Gale Force Nine stuff is pricey, but I wanted to get this since it includes many different sizes, and I wasn't sure which I would need. (Now that I have a better idea, I will head to my local train-oriented hobby shop and pick it up directly from the source, namely Evergreen and/or Plastruct).
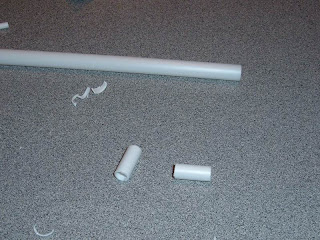
To start with, I cut some of the tubes to size (I might have to pick up a cheap tubing cutter, as it would make it easier to cut these without mangling the ends):
Then I made some "sandwiches" out of foamcore, and covered them in plasticard:
I made the rolla itself the same as last time, out of a 3/4" PVC coupler & reducer, and covered the ends with plasticard:
I decided to Greenstuff the gap in the rolla this time (and yes, it was a hassle, as I anticipated):
Like before, I cut some random shapes to act as armor plates, glued them to the rolla, and added rivets punched out of plasticard:
Next, I drilled holes in the plasticard "boxes" and set about getting the angles right - once I had them figured out, I glued the pipes in place and added rivets:
(Some Green Stuff was used to fill the tubing at the attachment points for reinforcement).
Some guitar strings were used to simulate hydraulic lines:
I drilled holes in the end of the support arms, and inserted toothpicks to attach the rolla:
Test fitting:
I used the small wooden spools as spacers - I decided they needed some rivets too, to help them blend in. I also added some toothpicks to the front:
And here it is mounted, and after the spikey bits have been added:
...at this point, the model sat on my desk for a few days while I worked on other stuff. I kept looking at it and thinking that the "spikes" needed something, but I couldn't think of what. One morning, inspiration struck: since they looked like pikes, how about some heads?
I started with these skulls from a Warhammer Fantasy Chaos Marauders kit. The skulls were originally mounted hanging from a banner pole, andthe sculpt had a metal bracket on the top of the skull (left pic) that I had to shave off & file down (right pic). I also dug into my Space Marine bits and cut some spare helmets from some sprues.
Then I just drilled through them with my pin vise:
,,,and mounted them on the spikes:
I also drilled some holes at the upper arms of the Rolla mount:
...and added these hanging-skull-on-a-chain bits:
Unfortunately, I got a little carried away with the pin vise, and accidentally drilled all the way through the arm:
...luckily, my bag 'o rivets was there to help:
...I gave the other side of the Battlewagon the same treatment.
And here's the finished product:
...overall I'm pretty pleased with the results on this one too. Did the styrene tubing speed up the process? Yeah, a bit - this one took me about three hours to build, as opposed to six hours for the first one, so it cut the time in half. It's still a pretty involved process, though. I think if I had the tubing cutter it would speed things up even more. I believe Plastruct & Evergreen also make styrene stock in rectangular shapes as well, and that would speed things up greatly - working with the foamcore and "wrapping" it in plasticard is the most time-consuming part. Lars4life tipped me off about a shop here in town that carries the full line of Plastruct products, so when I get a chance I'll head over and see what I can find...


I'm very impressed with your deffrolla, it looks really good. Nice work with the greenstuff glyphs as well!
ReplyDeleteThanks, Papa JJ! The greenstuff bits have come in really handy, and are a great way to add an extra touch. I did a write-up on making them here !
ReplyDeleteI will have to say I like Deffrolla 2.0 much better.
ReplyDelete